
*Squeek*
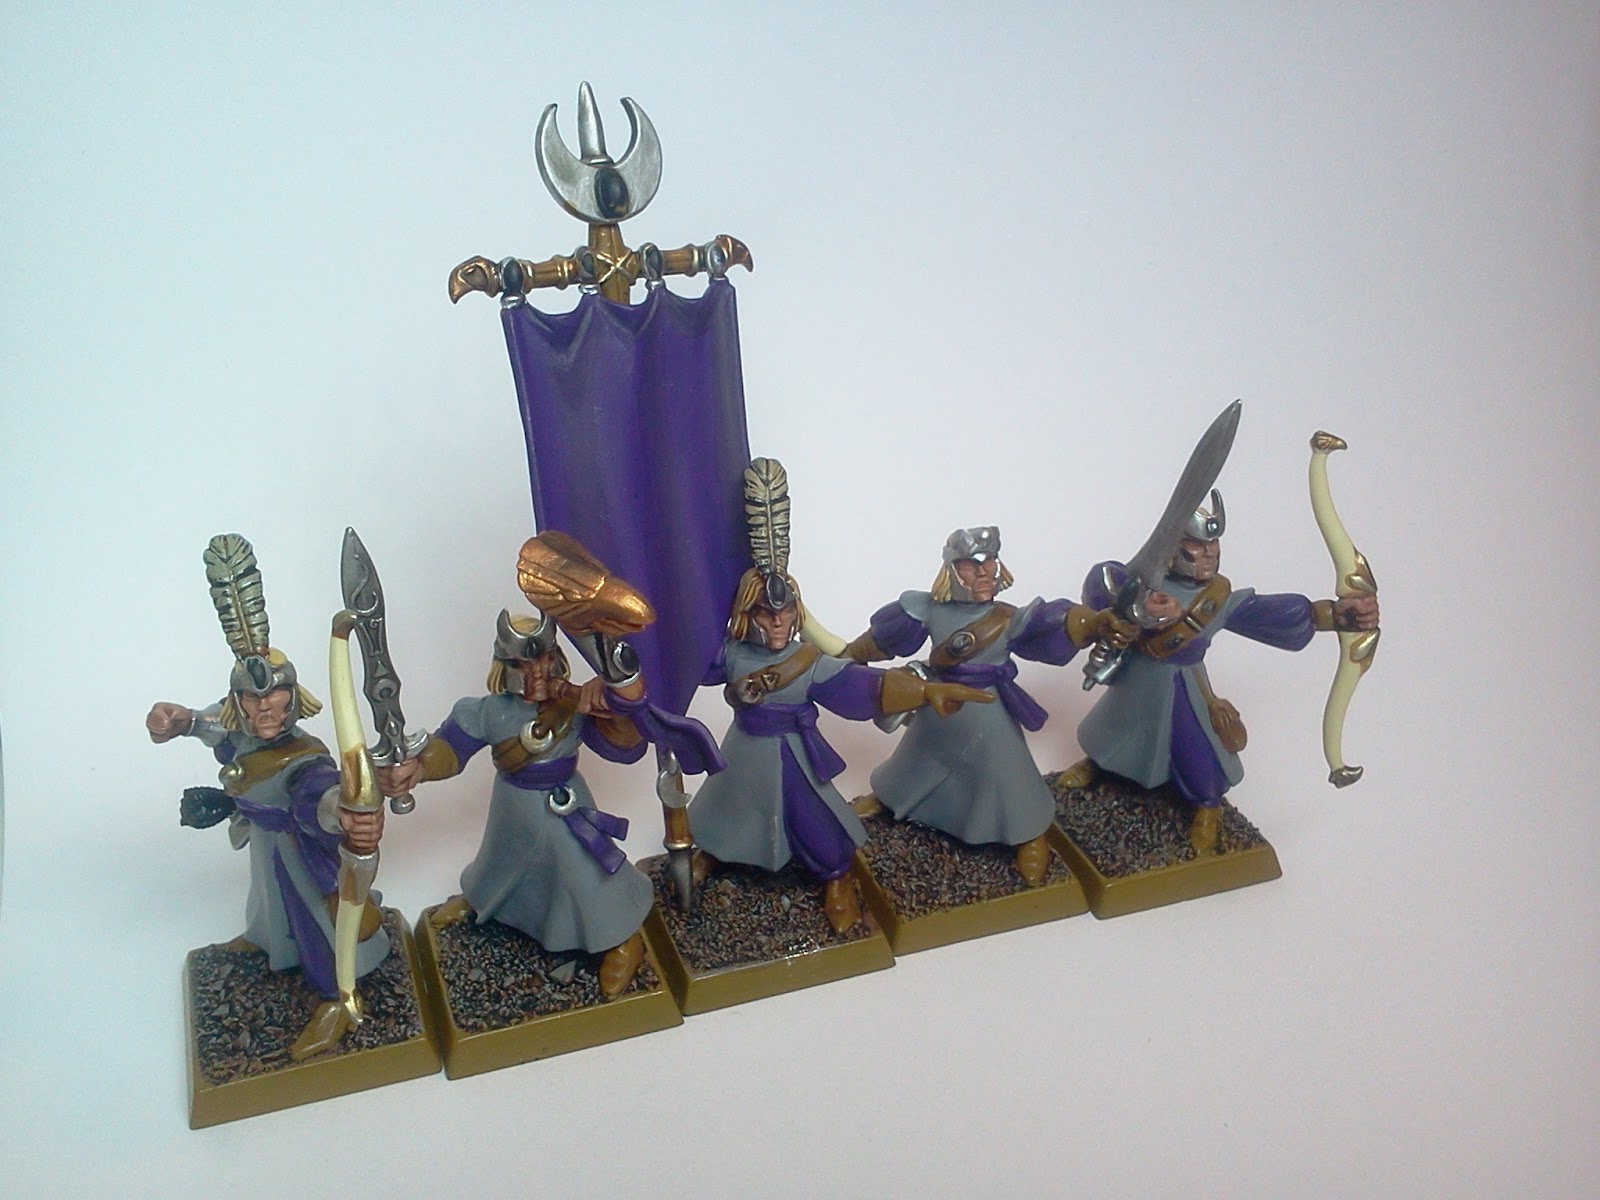
Below is a fairly simple step-by-step guide to painting High Elf Archers. These were one of the first units I painted in the Sons of Xereus. Hope you find it useful!
EDIT: Following the launch of the latest Citadel Paint range in 2012, please note that the colours listed below are from the previous range. I hope to have time to rewrite in the future, but for the time being, you can use the conversion chart/ list I made here or use the official Citadel Conversion chart here.
EDIT: Following the launch of the latest Citadel Paint range in 2012, please note that the colours listed below are from the previous range. I hope to have time to rewrite in the future, but for the time being, you can use the conversion chart/ list I made here or use the official Citadel Conversion chart here.
Paints used:
- Skull White
- Snakebite Leather
- Bleached Bone
- Chainmail
- Mithril Silver
- Dark Angels Green
- Snot Green
- Liche Purple
- Warlock Purple
- Calthan Brown
- Tallarn Flesh
- Dwarf Flesh
- Elf Flesh
- Sunburst Yellow
- Dwarf Bronze
- Codex Grey
- Fortress Grey
Washes:
- Gryphonne Sepia
- Ogryn Flesh
- Badab Black
(Wow, I can't believe that I used that many different colours on a model that looks so simple...but I did!)
Step 1: Preparation.
Assemble models.
Use a craft knife or file away flash/ mould lines (carefully!) With archers in particular make sure you pay attention to this on their robes and bows, as mould lines really show up later when painted if you don't get rid of them!
Step 2: First basing.
Sand down any flash or raised areas around the edge of the base.
Apply PVA glue to the top of the base, being careful not to get this on the boots of the model. (For variety, consider sprinkling a couple of pieces of crushed coral onto the PVA before the sand.)
Immediately dip the base into modelling sand.
TIP: Rub away any sand or glue that has dripped over onto the sides of the base now if you prefer a nice (clean-looking) base later.
Optional: Finish off the bases now (see Step 8, final basing).
Optional: Finish off the bases now (see Step 8, final basing).
Step 3: Undercoat.

Spray paint the model(s) using the undercoat of your choice. I use Citadel Chaos Black. Many people prefer a Skull White undercoat for brighter models like High Elves as the overall effect will be brighter and you will need far fewer layers of Skull White later on robes etc.
However, I often use black as it hides mistakes etc.
Step 4: Basecoats.

Chainmail: Bracelets/ bracers, helmets, details on bow, swords.
Bleached Bone: Bow stave, bow case, hair, pouches.
Snakebite Leather: Belt, shoes.
Liche Purple: Sleeves.
Dark Angels Green: Gems
Tallarn Flesh: Skin.
Calthan Brown: Unit standard pole.
Dwarf Bronze: Musical instrument.
TIP: I didn't do the Skull White robes until after washes (step 5 below) had been done.
Step 5: Washes.

Devlan Mud: Sleeves, belts, shoes, (leathers)
Gryphonne Sepia: Hair, details on bow, bow case.
Step 6: Layers.


Skull White: Robes (leave Codex Grey in the folds to provide some shading.) If using Skull White, be prepared to use many, many thin layers.
TIP: Don't be tempted to do thick layers though, the end effect won't look very nice.
Liche Purple/ Warlock Purple mix (50/50) on sleeves. Layer this up to a purer Warlock Purple to provide highlights on the raised areas of the sleeves (30/70)
Bleached Bone: Bow, edges of bow case, strands of hair
Tallarn Flesh/ Dwarf Flesh mix (50/50)
Dark Angel Green/ Snot Green mix: Gems. (70/30 mix, layering up to a 30/70 mix along the bottom edge of the gem)
Dwarf Bronze/ Shining Gold mix: (50/50) on the musician's instrument.
TIP: To make your gems really stand out, consider adding a tiny dot of pure Skull White at the top and/ or bottom of the gem.
Step 7: Drybrushing.
Codex Grey or Skull White drybrushed on the arrow fletchings.
Step 8: Final basing.
Calthan Brown: Overbrush across the base, being careful to avoid the boots/ legs of the model.
Snakebite Leather: Drybrush across the base. Paint the base edges. I usually find 2 coats gives a nice smooth finish.
Codex Grey: Drybrush lightly across the base, paint any crushed coral.
Fortress Grey: Drybrush any crushed coral rocks to add a natural highlight. Paint on PVA glue, and then sprinkle static grass onto the base.
I think that is it!


Cheers,
*Squeek*
It is a very nice clean look as an end result.
ReplyDeleteI've been playing with some left over archer and spearmen bits and you can create some very good "armored archers" from that - which may one day even be a legal unit again... :-)
Sounds like they would look pretty badass.
DeleteWill you post some photos at some point?
:-)