Monday, November 17, 2014

How to Paint a Skaven Warlitter


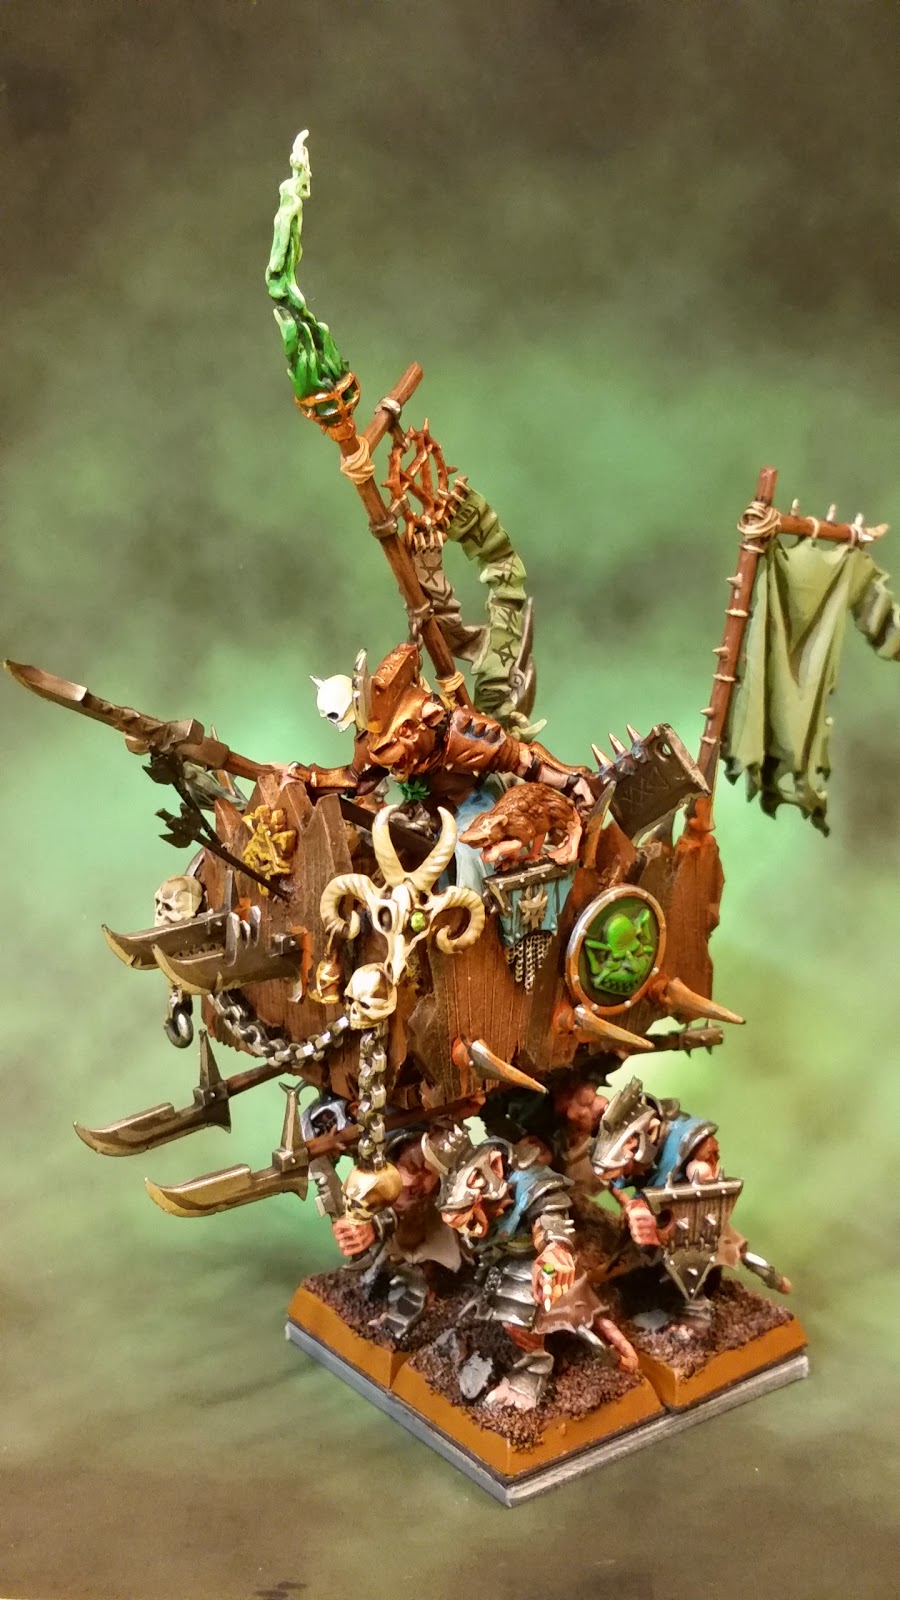
In my last post, I described the materials and process in scratch-building a Skaven War-litter. This time, let's look at how to paint it. As always, I'm not claiming to be a good painter! All my painting is just so I can get an army on the table that looks good from a distance.

On reflection, the Skaven Warlitter is actually made of 3 distinct parts:

  1. The Skaven Warlord
  2. The litter-bearers (crew)
  3. The Howdah
As I have posted "How to Paint" guides for both the Skaven Warlord and Skaven Stormvermin before, this post will just focus mainly on the howdah.

Step-by-Step:


1. Assembly 

2. Undercoat
I use GW Chaos Black spray, but any modelling undercoat spray will be fine! I prefer Black to White as this is a more forgiving colour for beginners. Anything you miss during painting will just appear to be in shadow.

3. Basecoats
Apply basecoats to the model (See list below)


Note: I still have some of "old" GW/ Citadel paints lying around. If you aren't familiar with them, here is a conversion chart I made to match them up with "new" paints.
  • Calthan Brown: Wooden planks, giant rats (fur)
  • Vermin Brown: Wooden plans (do some planks with this colour, or other, lighter browns, to add some variety to the wood)
  • Tallarn Flesh: giant rats (flesh)
  • Knarloc Green: Standard/ Flag. Also any warpstone chunks (embedded in skull eyesockets)
  • Ice Blue: Skaven Shields.
  • Abaddon Black: Arrows (added later)
  • Leadbelcher: Metallics - halberd blades, spikes, chains etc.
  • Dwarf Bronze: Skaven icon, shield parts.
  • Auric Gold: On edges of the Skaven gold icon on the front of the howdah
  • Bleached Bone: Skulls, cords (attaching flag to flag-pole)
  • Sunburst Yellow: Goblin shield heraldry.
4. Washes
The litter after washes
  • Agrax Earthshade: All wooden parts, flag/ standard, bones,
  • Nuln Oil: metallics (spikes, shield parts, chains, blades etc.)
  • Ogryn Flesh: Giant rat flesh.
NOTE: After highlights and drybrushing (Step 5, below) I made and applied a rust wash using watered-down brown and orange.

5. Highlights/ Drybrushing

After highlights/ drybrushing/ edge highlights. e.g.
Goblin shield (top edge) chains, blades, skulls etc.
  • Calthan Brown/ Skull White (80/20 mix): Drybrush raised areas of wooden planks and edges of wooden planks.
  • Bleached Bone/ Skull White (80/ 20 mix): highlights on skulls, bones etc.
  • Leadbelcher/ Chainmail (50/50 mix): Highlights/ edge highlights on blades etc.
  • Calthan Green/ Scorpion Green (40/60 mix): Edges of warpstone chunks in the skulls.
  • Tallarn Flesh/ Elf Flesh (50/50 mix): Giant rat skin.
  • Calthan Green/ Skull White (50/50 mix): Flag. You can do successively lighter mixes on the raised area of the flag.
From a painting perspective, you are done with the Howdah at this point!

Litter-bearers/ Crew:

As mentioned above, paint these as you would any Stormvermin (guide to mine here).
After painting, they should rank up and look something like this (ready to balance the howdah on top.)
Not ranked up, they can be used as normal, and look like
they are just carrying spears and clubs.

Ranked-up, and ready to lift the war-litter.
The final touch to the litter-bearers (if, like me, you don't want to glue them together or glue them on to a base) is to magnetize them. This will make it easier to use and move them when they are carrying the war-litter. I use magnetic sheet for this, as you an see in this tutorial.

Stormvermin, showing magnetic sheet attached to tray and bases.
Hope this is useful!

In my next post, I will look at how I made the 28mm arrows that you can see on the finished war-litter.

(EDIT: here is a link to "How to Paint a Skaven Warlitter")

Cheers,

Saturday, November 15, 2014

How to Make a Skaven War-litter


What self-respecting Skaven warlord wouldn't want to ride into battle on the shoulders of his minions, elevated above the common ratmen and the enemy? 

The Skaven War-litter allows your warlord to do just that...
...not to mention also being an easy way to add some extra attacks, increase your warlord's armour save AND keep his "look out sir" roll.

How do you get a war-litter? 
At time of writing, you have to build one yourself. However, it is actually not too difficult, and the materials are probably in your bitz-box already. Additionally, there are lots of good examples on the net that you can draw inspiration from. 

In this guide, I'll lay out what I did to get a war-litter ready for painting. Also, I'll show you how you can kitbash the litter and bearers so they can still be used separately (in other words, you won't lose x4 litter bearers by gluing them to a war-litter that you might not always want to use.)

Ready?

Building the War-litter - gather your materials!


Howdah:
Plastic sheet 1-2 mm thick. (I used leftover GW movement tray material, which is 2mm thick.)
  • Floor: x1 (30mm x 37mm)
  • Side walls: x2 (20mm x 40mm)
  • Front wall: x1 (20mm x 30mm)
  • Rear wall: x1 (20mm x 30mm)

Optional: front wall "trophy panel" (optional): x1 (20mm x 20mm)


TIP:  For speed and convenience you might want to use a material that is thinner and easier to cut than GW movement tray...

Decoration:
x1 Skaven Warlord (sold separately - I use the Island of Blood Skaven Warlord)
x1 Flag (Stormvermin unit flag works well.)
x5-6 shields (Skaven shields are great, but a variety from different armies works well.)
x12 Spikes - to decorate the walls and repel boarders (I used old Goblin spear tips, but any old swords can be cut down)

Optional: x1 -2 giant rats (Skaven players often have these left over from their sprues)
Optional: Chains and skulls (Chaos bits?) 
Optional: x2 halberds and chain to make a weapons rack inside the war-litter.
Optional: x2-3 arrows (more about making those later!)

Litter-bearers:
x4 pre-assembled Skaven Stormvermin with halberds (I prefer them to Clanrats, but the choice is yours!) 

TIP: The halberds you want are held in their right hands (on their left as you look at them). Do not glue them onto the bodies yet!!


Assembly!

Front and right side (Click to expand)

Left side (Click to expand)

Right side (Click to expand)

The difficult thing here is not the litter itself, but actually the litter-bearers. Let's look at them separately later.

War-Litter.

1. Score the plastic to simulate "grain" in the wood. Before gluing everything together, you will want to score the plastic to make it look like wood. To do this, take a box cutter and run the blade down the plastic vertically. Don't do everything evenly. You are trying to create a "plank of wood" effect.

2. Cut the top and bottom of the walls to simulate "planks". Cut the edges of the panels so they look random, and like planks of wood.

3. Glue the war-litter. Glue sides, front (and optional "trophy panel") and rear to the base.

4. Decorate. Glue optional decorations into place around the walls (e.g. chains, spikes, shields, rats, flags, weapons rack etc.)

5. Add arrows. Glue/ drill arrows into place.

TIP: When adding the arrows, think carefully about the angle and positioning. Would they stick "straight" out of the wood, or angled up (more likely, if they had come as a volley from long distance).

The howdah is not ready for undercoating.


Litter-bearers.


1. Assemble x4 Stormvermin bodies on bases, without their right arms (on your left as you look at the model.)

2. Cut away/ file down the shoulder armour/ shoulder pad on the Skaven where the arm will be glued until the arm will fit closely to the body with the arm pointing up and with the halberd haft horizontal (parallel to the ground.)

TIP: Before gluing each arm, carefully eyeball the arm and halberd hafts so that you glue them on straight...
They don't have to be perfect, as you won't notice it when they are on the table, but you want the halberd hafts to line up horizontally when the litter-bearers are ranked-up, as shown in the images below. 

Notice how the halberd hafts line up.

3. Glue arms into place.

4. On the front two troops, cut the halberd blade off where it meets the haft. Then glue them to the opposite end of the haft (Glue blades towards enemy), so they are now pointing in front of the model. Remember - pointy end at the enemy!

5. On the rear troops, cut the halberd off where the blade meets the haft. Save these two blades (or stick them on the front of your war-litter as I did!)

6. Glue modeling sand to the base in preparation for undercoating.

So, you now have the assembled war-litter and litter-bearers.

What you will find is that by pushing the bases of the bearers together, the hafts of the halberds should roughly line up, allowing you to balance the howdah on top...

TIP: Do NOT glue the howdah onto the litter-bearers at this point, even if you intend to glue it later! That will make painting the litter-bearers almost impossible...

In my next post "How to Paint a Skaven Warlitter", I'll go into detail about the colours I used.

If you have any questions, let me know in the comments!

Cheers,


Sunday, November 9, 2014

Finished Skaven War-litter

Here is my scratch built Skaven War-litter. 

Fit for a king...
...Or at least for a Skaven Clan Warlord! 


The War-litter on the move! Spikey!
True to the Skaven ethos, it was made from scrap (spare bits) from my bitz box over the course of a couple of days. In gaming terms, it seems like a pretty good way to add some protection and power to the standard Warlord (an additional x4 WS 4, STR 4 attacks from the litter bearers and +1 armour save).

In a future post, I'll outline the process I took, but for the moment you can see that fortunately I had lots of access to spikey stuff in my bitz box!


Four of the strongest Skaven Stormvermin carry the litter into battle....
The walls are reinforced with shields. Rusty spikes are
attached to the walls to dissuade the enemy from climbing aboard.

The litter-bearers aren't glued, so they can still rank up
and be used in a unit if I am not using them to carry the litter.

However, put the litter-bearers together and they rank up so that the
litter can be balanced on top of them.
I magnetized the crew and their movement tray, so when they carry
the litter they are stable and easy to move.
War-litter team leader sez "That ways - go that ways!"

Detail of the weapons rack...
(easier to see with the warlord removed!)

I tried something new for this project, which was making my own 28mm Black Orc arrows. I wanted to stick these into the outside of the war-litter. I think that creates the effect that it has been under attack or is in the midst of battle.

I'll add a "How To" to the blog when I can!

Cheers,

Saturday, November 8, 2014

A Whole New World #2 WOC Battle-report

Battle Report 1: Sunday, November 2nd 2014

Continuing on from my 1st post in this series, where I outlined my (I now realize illegal) 1,000 point list, here is a battle report on my first battle of the day.
(Actually, more of a set of game highlights than a battle report, as I don't have detailed notes about each turn...)

Before I get to my opponent's list though, let me note a couple of interesting things about the match:
1. This was my first ever "timed" game. 
I'm a notoriously slow player! To get in two games, we decided to try to limit the total each player had for their turns to 45 minutes. This was an interesting challenge for me. If you are more of a "Painta than a playa" (like me) I recommend trying this from time to time as it can help build your confidence - although you'll learn some hard lessons along the way.

2. I've never played against WOC before, so I had absolutely NO idea of what the units could do. I actually do own an old WOC army book, but not owning a WOC army means that until now it was more an interesting read than an opportunity to gem-up on units (and the book I have is also from the previous edition). Like all my Warhammer books, it sits in a rack above my "Porcelain Throne" ('coz that's the only place I get to read in peace and quiet...)

My Skaven army list.

"The Great Dane's Warriors of Chaos List"

Heroes:

X1 Chaos Sorcerer (Level 2 Wizard)
Eye of the Gods,  Lore of Shadow, Chaos Mutations, Powers,Chaos Familiar,
Daemonic Mount (Daemonic Attacks, Fear, Stomp, Swiftstride) 
Magic Items: Charmed Shield, Talisman of Preservation (45pts)

X1 Exalted Hero.
Eye of the Gods Battle Standard Bearer, Chaos Mutations, Powers, Great weapon, Mark of Tzeentch, Barded Chaos Steed (Swiftstride)
Magic Items: Ironcurse Icon, Talisman of Protection.

Core:

X1 Chaos Chariot (Scythes, Swiftstride, 2x Chaos Charioteers)
X5 Chaos Warhounds (Swiftstride)
X5 Chaos Warhound (Swiftstride)
X10 Chaos Warriors (Shields)

Special

X5 Chaos Knights (Fear, Barded Chaos Steed (Swiftstride), Standard Bearer,
Ensorcelled weapons, 5x Mark of Tzeentch)

Model count comparison?
Skaven: x135 (including war machines)
WOC: x28 (?????????)

Whisky Tango Foxtrot, that is a large model count discrepancy in favour of the rat-men (as it should be!), but would that help me?

Deployment.

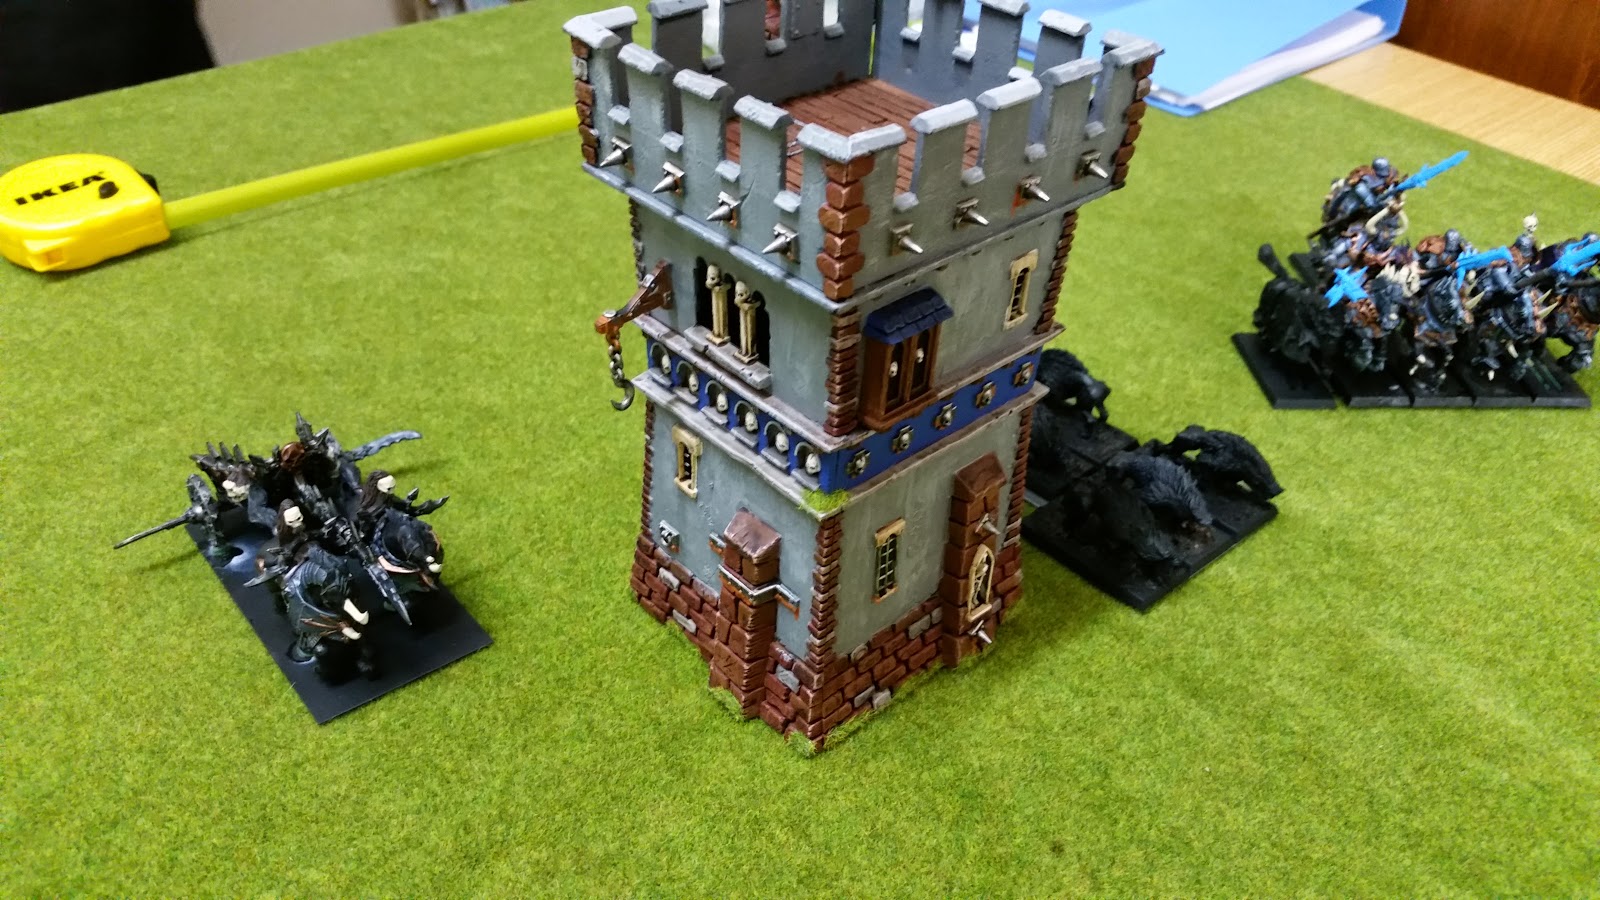
For simplicity, we chose a straight up battleline game. The table had some terrain in the form of a couple of buildings. Skaven setup was a line in the center, with PCC and WLC on a hill to maximize their view. 
Skaven
L-R: Slaves with Warlock Engineer, x30 Clanrats with Warlord, warmachines, x20 Clanrats with BSB, slaves.

WOC:
L-R: Chaos Warhounds, 10 Chaos warriors, Chaos Chariot, Chaos Warhounds, Chaos Knights.
Noting the speedy Warhounds on either flank, and the knights on the right, I placed my slaves to either side of my battleline. I was hoping that my warmachines would take out a healthy chunk of the Chaos warriors before they made it into combat in the centre, allowing the clanrats to drive them from the field.

Skaven Battleline (L-R) Slaves, Clanrats, WLC, Clanrats, PCC, Slaves

Early Turns: Magical and Mundane Misfire MADNESS!

After an opening movement phase that saw the Skaven mostly sit tight, with some limited forward skittering by the slaves, we went into our first Magic phase.

My lone Warlock Engineer threw everything into firing off Skitterleap, and casts the spell with irresistible force. Knowing that he may be about to be blown to pieces by the force of his own magic, he Skitterleaps next to the Chaos Wizard, hoping to take the dark conjurer with him into oblivion. The magical explosion does hit the enemy wizard, but his enchanted shield saves him (CURSES!). 
Singed but not killed, Warlock Engineer "Boom Boom" Vilekin says a prayer of thanks to the Great Horned One, and starts off the shooting phase by aimings his Doomrocket down the ranks of the Chaos battle line.
The rocket streaks off into the sky, but only manages to clip the Warriors of Chaos, killing one.


Engineer "Boom Boom" Vilekin almost lives up to his name (L)
Aiming at the same Warriors of Chaos, the Warplightning cannon charges up, but immediately suffers a misfire, rendering it ineffective...
Not a great start...
...which became an even worse start when the Plagueclaw catapult aims and also misfires, allowing my opponent to place the template square within 3D6 inches of the target point. Fortunately, none of my units were close enough to take any damage. Phew! 


Curse you Pestilens and Skryre, the war-machines you sold me are cursed!
Chaos moves across the table...
Struck by "Mystical Miasma", the slaves can barely move

Heavily armed (and armoured) Chaos Warriors advance in the center.

The Chaos chariot (L), speeds forward, accompanied by the Warhounds
and Chaos Knights to the right of the abandoned watchtower.
After weaving some dark magic on my Skaven slaves on the left flank, ("Melkoth's Mystifying Miasma") the Chaos sorcerer also suffers a miscast from his magic while attempting to cast "Fly". Like the Skaven Warlock before him he appears in the Skaven rear, but fails to use his magical misfire to his advantage.


"Watch out lads - Chaos Wizard in our rear!"

More "Misfire misery"...

With the Chaos army advancing on all fronts, I was hoping (praying!) to make up for my previous poor round of shooting with some hard-hitting Warplightning Cannon and Plague Claw Catapult shots...
...but that was not to be.
The WLC misfired again, this time being totally destroyed...
...and my PCC also misfired (Double CURSES!). This time my opponent was able to place the template over my unit of slaves on the right flank, killing around 8 of the Goblin skaven slaves. 
No great loss, but no help to me in terms of thinning out the ranks of the Northern army, and it would mean that the WOC fast movers (most of his army!) would be upon me in the next movement phase.
Yes, it happens! The WLC miscasts and blows up on turn 2, leaving a hole....
Goblin slaves...dropping like flies!

The Dice Gods are (equally?) fickle...

While not much consolation for the awful shooting, my slaves on the left flank manage to drive off the Chaos warhounds, who flee back towards their lines through a building. Perhaps the Chaos gods were angry at their cowardice, as my opponent rolled four "1s" on his dangerous terrain test for the unit, resulting in all the Warhounds being destroyed.

Four Chaos Warhounds, four dangerous terrain tests, four fails!?
From here on, things get a bit hazy...(a few too many cans of "Bugman's", and not enough photo evidence) but some highlights were....

The dark wizard moved into the rear of the Skaven lines, tying up my catapult in close combat, so it could not fire.
Meanwhile the Clanrats and Warlord drove away the Chaos warriors and ran them down, principally due to some very poor rolls on the part of my opponent.
NOTE: I later learned that my Warlord build was illegal. The "Warlock Augmented weapon" does not buff another weapon carried with +1 Str+1 Attack, but is a weapon itself. I thought it augmented the Halberd my warlord was carrying, resulting in an overall +2 Str and +1 attack. This meant my warlord had an illegal x5 attacks at Str 6, when he should have had x5 attacks at strength 5.

Here are some photos of the rest of the action...
The Dark Wizard assaults the Plague Claw catapult (Curses!)
The Chaos Chariot and Chaos BSB get stuck into the Clanrat bunker
The Chaos Knights (R) line up for a charge at the Skaven warlord
and his unit of Clanrats (top left)
 
The gobbo slaves excitedly crash into the rear of the Chaos knights...
...while the Skaven slaves (L) try to maneuver themselves back into the fight.
The grand melee! The Skaven warlord is wounded, but holding out...

Long story short, by the end of the game I had lost:
x1 Chieftain -(92 pts) who was my Battle Standard Bearer (100pts) 
x20 Clanrats (Full command). (110 pts) (+Standard Bearer 25 pts)
x1 Plague Claw Catapult (100 pts)
x1 Warplightning cannon (90pts)
x1 Warlock Engineer (95 pts)
Total losses: 612 pts

Whereas the forces of Chaos had only lost:
x1 unit of Warhounds (30 pts)
x 10 Chaos Warriors. (150 pts)
X1 Exalted Hero (187 pts)
x5 Chaos Knights (235 pts)
Total losses: 415 pts

A big loss for the Skaven!

Post battle analysis:

Warmachine failure:
Obviously the poor performance of my warmachines didn't help me in this game! 3 misfires in a row really hurt my chances when I was hoping to make a big dent in the Chaos forces before they closed in on me. 
Possible lesson? None. There isn't much I can take away from those unlucky rolls!

Deployment:
Should I have placed my slaves in the center of the line or on the flanks? 
My slaves survived, and maybe they shouldn't if I had used them properly! Losing my smaller clanrat unit and BSB cost me dearly in points. 
Possible lesson? If you are going to have a bunker for your BSB, then really try to avoid combat! This will include making some difficult decisions at deployment. 

List Building:
My misunderstanding of what the "Warlock Augmented Weapon" does affected play (although not the outcome of the game obviously).
Possible lesson? When trying new units or equipment, review them really, really carefully.

Warlock Engineers:
Should I have defaulted to Warplightning instead of Skitterleap? After launching my Doom-rocket, there wasn't a lot the Engineer could do in terms of damage. 
Possible lesson? Use your Engineers more aggressively. Teleport around the table to redirect enemy charges or interrupt marching.

Magic Miscast (A.K.A. Skaveny Suicide"?):
If you cast Skitterleap with irresistible force, you know you are going to have to roll on the miscast table. Consider teleporting behind or next to an important enemy target (1 inch). If you roll between a 2-6 ("Dimensional Cascade"/ "Calamitous Detonation"), you have a chance of damaging your enemy... If you survive, you might still be out of harm's way, yet force the enemy to deal with you, or be in a position to line up for an attack or to do something useful.

...and finally, some post match perspective, courtesy of my opponent:

"I think the main thing I did in that game was running around A LOT. I made it very difficult for you to charge me because I ran outside of your arch of visibility and my dogs were put in your way from time to time. Your characters were spread out in your big units so not matter who I attacked I knew I would kill something important of yours.
It would have been much more difficult if you had 2 big blocks of slaves to stop me and a smaller bunker behind to give rerolls and leadership. That way I would never have gone through them all in time. Also, bringing only a level 1 is almost always useless - except for the rare cases where you get a very small winds of magic roll. Usually the one spell is not worth a miscast and I will be able to throw all my dice at it - you have a maximum of 6 dice for casting and I can cast all the dice I want for dispelling. I think you should also have waited to shoot the rocket from your engineer. You were aiming for 30 point dogs and you were very far away from my important units - the warriors. I did not have any shooting or magic damage so you could have moved behind me and waited for a perfect shot." 
So, lots of lessons for me! 

A big thanks to my opponent, who was a gentlemen and a good person to play against for my first battle against the Warriors of Chaos. 

Later the same afternoon, I would have another chance to learn about WOC, as my second game would also see the Skaven face off against them (but against a different player). Look out for  my next battle report!

Cheers,


Monday, November 3, 2014

1,000 points - a Whole New World... #1

...at least for this warlord!

Having never played at less than 1,500 points, when I heard that last weekend everyone would be bringing 1,000 point armies I was quite excited. What would fit in? What could I use that would be different? Would I win anything at all??

In what I plan to be a series of three posts, I'll take a look at my list, then my first and second battles respectively.

Let's have a look at the models and the list, then I will share some thoughts:


The leadership team: (L-R) Chieftain, Warlord, Warlock Engineer

The 1,000 point army (L-R) Slaves, Slaves, Clanrats, PCC, WLC, Clanrats

..and here is the list (with names).


Skaven 1000 dual war machines (999pts)

Lords:

x1 Warlord - Squeek Vermintide

Halberd, Warlock-augmented Weapon, Armour of Destiny, Ironcurse Icon
EDIT: thanks to reader Lionel Sonnette, I now know that the combination above is illegal. As the Warlock-augmented weapon counts in itself as a weapon, I cannot combine it with the Halberd (because the Halberd counts as a two-handed weapon). I would have to take one or the other. My mistake was to think that this device "Augments the weapon" being carried with +1Str/ +1Attack, and that is wrong. I will be contacting my opponents to apologise!

Heroes:

x1 Chieftain (BSB) - Faderife of Black Chasm
Halberd, Charmed Shield, Talisman of Protection

x1 Warlock Engineer - Creak "Boom Boom" Vilekin
(Level 1 Wizard), Skitterleap, Doomrocket

Core

x30 Clanrats - Kreep Kraktooth's Kritters (Full command) Shields 
x20 Clanrats - Pungnail's Plunderers (Full command) Shields
x40 (Goblin) Skavenslaves - Tos Bonegibber's Ladz (Musician)
x40 Skavenslaves (Musician) - Those about to die (and if you don't...we shall eat you.)

Rare

Plagueclaw Catapult - "The Muk Spredda"
Warp Lightning Cannon 

List-building thoughts:

What's the same?

It was fun to think about and experiment with a smaller list, but in some ways, it isn't too different for Skaven, even when you aren't sure what armies you will meet on the day.
  • You can fit in multiple Rare choices (Cannon and Plagueclaw are still super cheap right?). 
  • You can of course take more bodies than your opponents and meet or exceed the "1 model per 10 points average" guideline for a Skaven army. I had 130 rats in my core selection on the table.
  • We have some silly cheap units (Giant rats, Warlock Engineers, slaves etc.)

What's different?

On the other hand, you can make it a lot more interesting for yourself by avoiding the tenets of Skaven list building, which offers a lot of fun and challenge (if you are playing in a casual group as I do):
  • I didn't take a Grey Seer. 
    • This limits your magic phase obviously. I had a Warlock Engineer (level 1). Only having one spell is interesting!
    • This also meant different leadership - a Warlord (I never use a Warlord at 2,000 points).
    • No Screaming Bell etc.
  • Avoided "Dual-Cannon", instead opting to try a Plague Claw catapult for the first time.
  • Didn't use any specials. No Plague Monks, no Gutter Runners.
  • I didn't take a Plague Wind Mortar with my Clanrats (more money to spend on Warlord but still keep my core numbers...)
  • No "Chaff" to run interference on the flanks or screen my war-machines for a turn.
  • No Doomwheel...
One big question was how to run my leadership? 
As I have never used Warlords in larger games I'm not very experienced for tooling them up. Reading around, was I going to go for "Defensive" or "Killy"? In either case I'm sure many people would argue that I spent too many points on him (around 180)

I ended with a bit of defense (magic armour with Ward Save), and x5 Str 6 attacks (thanks to the Halberd and Warlock Augmented Weapon). I'm sure more experienced Skaven players out there can give me more advice on how many points I wasted in this guy!
(The other choice was to "Sword of Bloodshed", giving him more attacks but at his regular strength, possibly buffed by a Potion of Strength ...for one round).

Before anyone asks, I don't have a Warlitter kit-bash done yet. The extra bodies and attacks would have been nice though.

In part II and III of this report, I'll answer:
...what armies did I face?
...how did my warlord build work out on the day?
...without hard-hitters (like Plague Monks) would I be able to defeat anything at all?
...what stupid mistakes did I make? (and what can I learn from them?)
...what was it like to use the Plague Claw Catapult?
...is having only one wizard a recipe for disaster?

Cheers,

*Squeek*

p.s. If you are interested in Skaven name generators (I feel they add the requisite flavour!) then check out:

Tuesday, October 21, 2014

Throwback Tuesday...Skaven Screaming Bell

*Squeek*

Possibly the signature war machine of the Skaven army, the Screaming Bell is as wonderful a model as it is a awesome presence on the Warhammer battlefield. I painted this in 2011.

Pushed into battle, the Screaming Bell makes the unit pushing it unbreakable...

The Grey Seer rides atop the Bell...
The Bell Ringer...a Skaven Rat Ogre


A bit of home-brew rust was painted onto bolts etc.
The Rat Ogre. Blue is my clan colour.

The brazier, with fumes.


A patina of corrosion on the bronze...made with very watered-down Ice Blue paint.

This was one of the first "Big" kits that I every painted for Warhammer, so it was a big challenge for me, and it was a good chance to try a few new things, which (I think?) included:

1. adding some simple home-brew rust effects. 
2. "hacking" the model so I could still also use it as a Plague Furnace, so it remains dual-use (you can make 1 of 2 kits with the parts included). You can find a guide to the conversion here.

I have to be honest and say that unpacking this thing is still a joy, just because it is a cool model, with lots of character.

Cheers,

*Squeek*
Related Posts Plugin for WordPress, Blogger...