Monday, February 17, 2014

Brother Luthor - Black Templars Dreadnought.


"Brother Luthor...
...Brother Luthor...
...Brother, can you hear me?"

++
++Subsystem Re-activation Routine Delta Bravo Initiated++
++checking++
++checking++
++COMPLETE++

++I...HEAR...YOU...BROTHER CADWELL++

"The Chapter calls, Brother Luthor. We have need of you."

++I...STAND...READY++

------
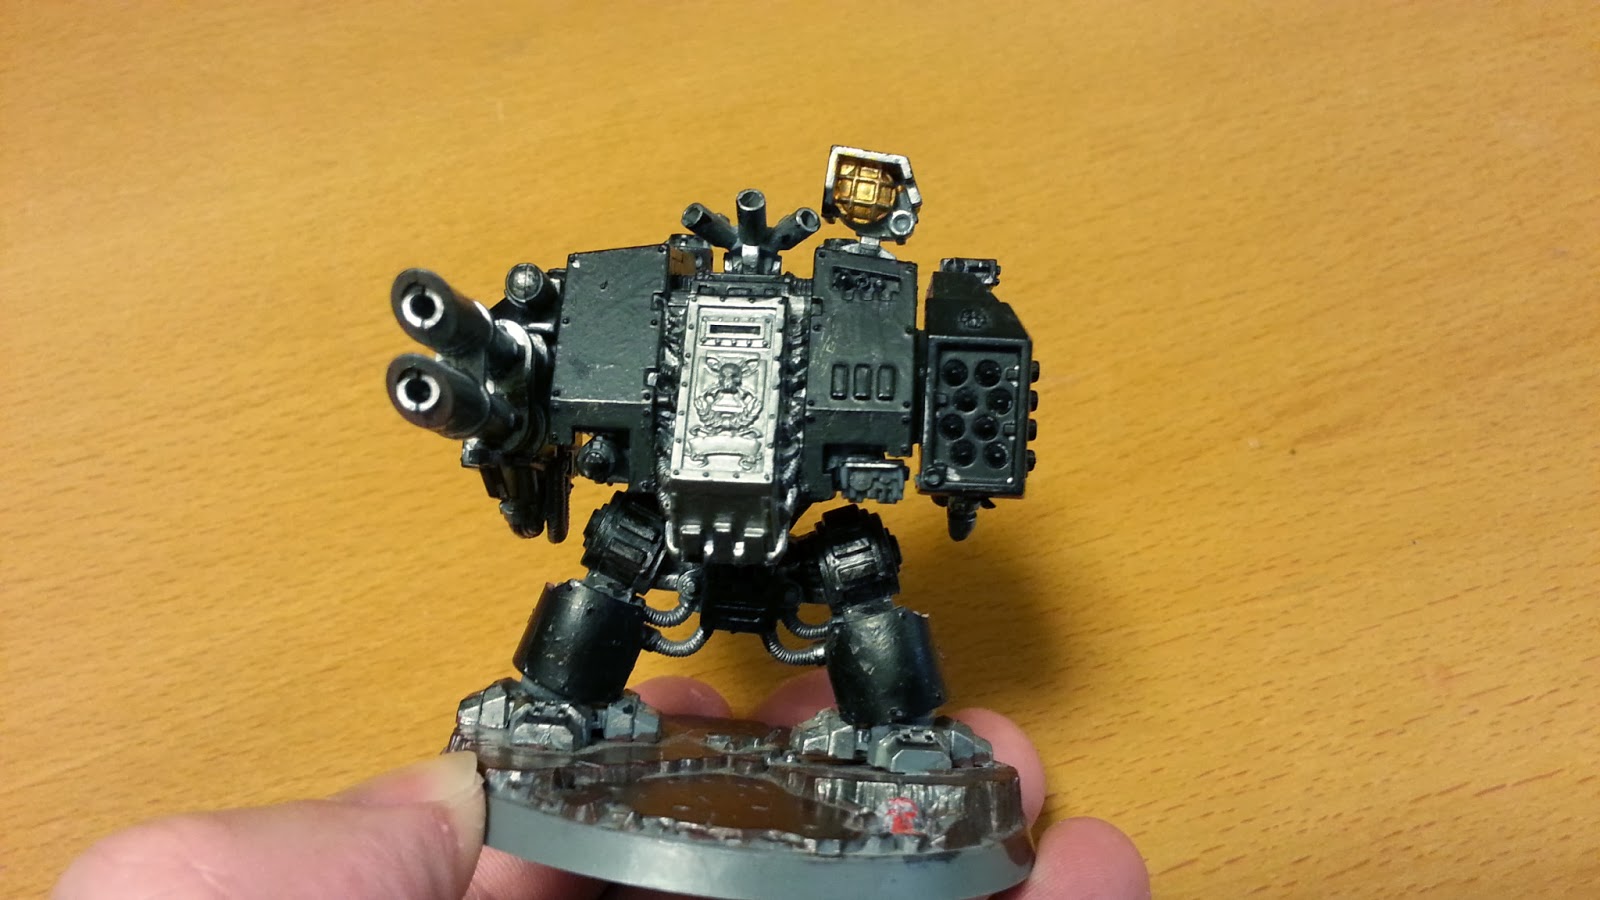
Have you ever had one of those moments when you looked back at a model you thought you had finished, and somehow, you realized it wasn't complete? I don't mean that it wasn't finished in a technical sense, but that somehow, there was something else that needed to be there?

I had that this morning.

The Dreadnought I thought I had finished the other day? Something "wasn't there". It struck me that he was no Templar, but that with a couple of touches he could be.

A shield and three purity seals.
These 4 items brought to mind a name, and a backstory!

Today, Brother Luthor joins the Chapter!
:-)

Here are a couple of photos to compare the Dreadnought as was, with the Brother Luthor that is!

Before... plain left panel
After: Shield on left panel. Purity seal under right panel.
x2 purity seals under las-cannon.
Another view of left side.

Sometimes, it is the little things in life!
Cheers.

Saturday, February 15, 2014

Black Templars Chaplain - Update


So I picked up a Black Templars Chaplain with jet pack a few months ago. He was already nicely painted, but I have had it on my mind to see if I couldn't do something additional for a while (when I pick up something already painted from eBay, I don't really feel it is mine until I have painted it - even if only a little bit.)

Tonight, I spent a while with some washes, colours and highlights. The changes are minimal, but he feels as though he is mine now!


Before...


...and after:

It is quite difficult to tell, but it involved:
a.) Grey/ blue edge highlights on the armour.
b.) Washes and highlighting on the cloth.
c.) Washes and Auric Gold highlights on ornaments and Crozius.
d.) Base. Sand, basecoat, wash and drybrushing.
e.) Metallic highlights/ wear on some edges.

Cheers!

Friday, February 14, 2014

Black Templar Dreadnought - Finished!

Here we go - my first finished Dreadnought!


I had a go at chips on the greaves, firstly using the "foam technique" I had used before, and then (for the first time) tried to paint on some chips and shadow. Sadly the latter didn't work at all. Still, have to start somewhere, right?

Here is the way I received the dreadnought, just for comparison:


Cheers!

Thursday, February 13, 2014

Black Templars Dreadnought WIP #1

Dreadnought under way!
Base colours.
A wash or two!

Ah, the Dreadnought...

A staple of the 40K universe, I have always felt that despite Dreadnoughts being a relatively minor part of the lore, they somehow have a hold on the reader that goes deeper than the Tactical Space Marine.
Entombed in a womb-like coffin when near death, they embody both the experience of the Space Marine and their fighting prowess. For me though, they have an almost tragic aspect. Proud warriors and mighty heroes laid low by their wounds, they are kept in a kind of undeath. Awakened only to lumber to war, or to provide advice based on their thousands of years of tactical or strategic experience, I imagine this almost to be a living hell for these once dynamic masters of the battlefield...

...but on to the WIP!

Another eBay acquisition, this Dreadnought came undercoated, with some metallic paints applied, a brown layer of paint on the base (and plenty of mould lines.)


I thought a Dreadnought might be a fairly quick win after completing my first Drop Pod, so yesterday I did some work on the basics

a.) Filed down some of the mould lines.
b.) Added base coats.
c.) Added a dark wash.

Here is where we are now (before and after a wash)

Base colours:


With washes:

(Nuln Oil on the body, Agrax Earthshade on the base)


Hopefully, I can get some drybrushing and a bit of highlighting done before the weekend!

Cheers,

Tuesday, February 11, 2014

Black Templars Drop Pod WIP #2 and Finished

Moved from washes to highlights, so we are done for now. My first ever drop pod is ready for the tabletop I reckon!

Weathering and washes:

I fixed up all the paint spatters that were on the shell of the pod following getting the base coats done, then attacked the main parts of the pod with washes (Badab Black). 

After that, (and spending a while drooling over the really nicely weathered pods you can see all over the net) I got down to the weathering. I decided to stick with the "Packing foam on a stick" approach as I had tried this before (with my Riptide).

You can see the results of the weathering and washed below. These are before highlights were applied.


I stayed mainly to the edges, but also had a go at the large flat surfaces of white too, hoping that this might break them up a bit. 

I wasn't entirely happy with the results, so I found myself hoping that a bit of drybrushing/ streaking would bring the whole pod up to my liking...


...and it did!

Drybrushing:


The drybrushing makes quite a difference on the ramp.


...and on the top edges or the ramps, really adding some wear...
Drybrushing on the main engine also made a lot of difference.
Interior, with restraint emergency release buckle in red.
Interior. Radar display in green in the middle.


Voila! One Black Templars Drop Pod!

:-)

Cheers!
Related Posts Plugin for WordPress, Blogger...