Showing posts with label Iron Helm. Show all posts

Tuesday, June 20, 2023

Iron Helm

 'Age shall not weary them, nor the years condemn...'

...at the going down of the sun and in the morning,
we will remember them.

(From 'For the Fallen', by Laurence Binyon)


I've been playing a lot of Iron Helm in the morning before work.

A quick set up, tough dungeon-delving solo game, it is well worth a look if you like a simple-to-play system that involves some interesting resource management decisions. I really like the premise of being an older adventurer who is on the verge of retirement and just needs to pull off one more delve to get the gold to retire (In computer games I'll often design my character as older.)

Iron Helm is (to date) the only 'print-and-play' game I have (a quick Google search will point you to sites where you can buy a print-on-demand version, or pay and download the files.) It was quite an adventure in itself to make it  but I'm glad that I did! There is a quite a sense of achievement in seeing a game you have 'made' yourself - even when the game kicks you between the legs and then stomps on your head when you hit the dirt. Despite that, every game feels like a memorable adventure with highs and lows and some thinking as you learn the cards and hone your techniques. It makes me sad when my adventurer meets their doom!

Moliclan rolls a perfect parry to fend off the terrifying wraith!


I won't talk about how to play here, except to say that for a simple game I come across a lot more rule-checking than I thought I would, mainly to do with timing and specific cards (I'm looking at you mimic...) The rulebook covers the basics, but you soon realize that there is stuff that should be covered but isn't. This is included in a supplementary book/ PDF, and many other questions are answered in online forums and a fan-made FAQ.

Fan-made tracking cards for your stats
'Comprehensive resource tracking cards' by Karsha


However, what Jason Glover has achieved here with just a deck of 16 dungeon cards to choose from is really impressive. Every time I turn over a card I feel tense, and the line art is very evocative and gorgeous.

Highly recommended.

I found the 'Cinderblade'! Now we're cooking!


Saturday, June 17, 2023

What I'm playing: More Hexploring over and under ground.

 Necromancy makes death more fun...


The valley stretches out before you

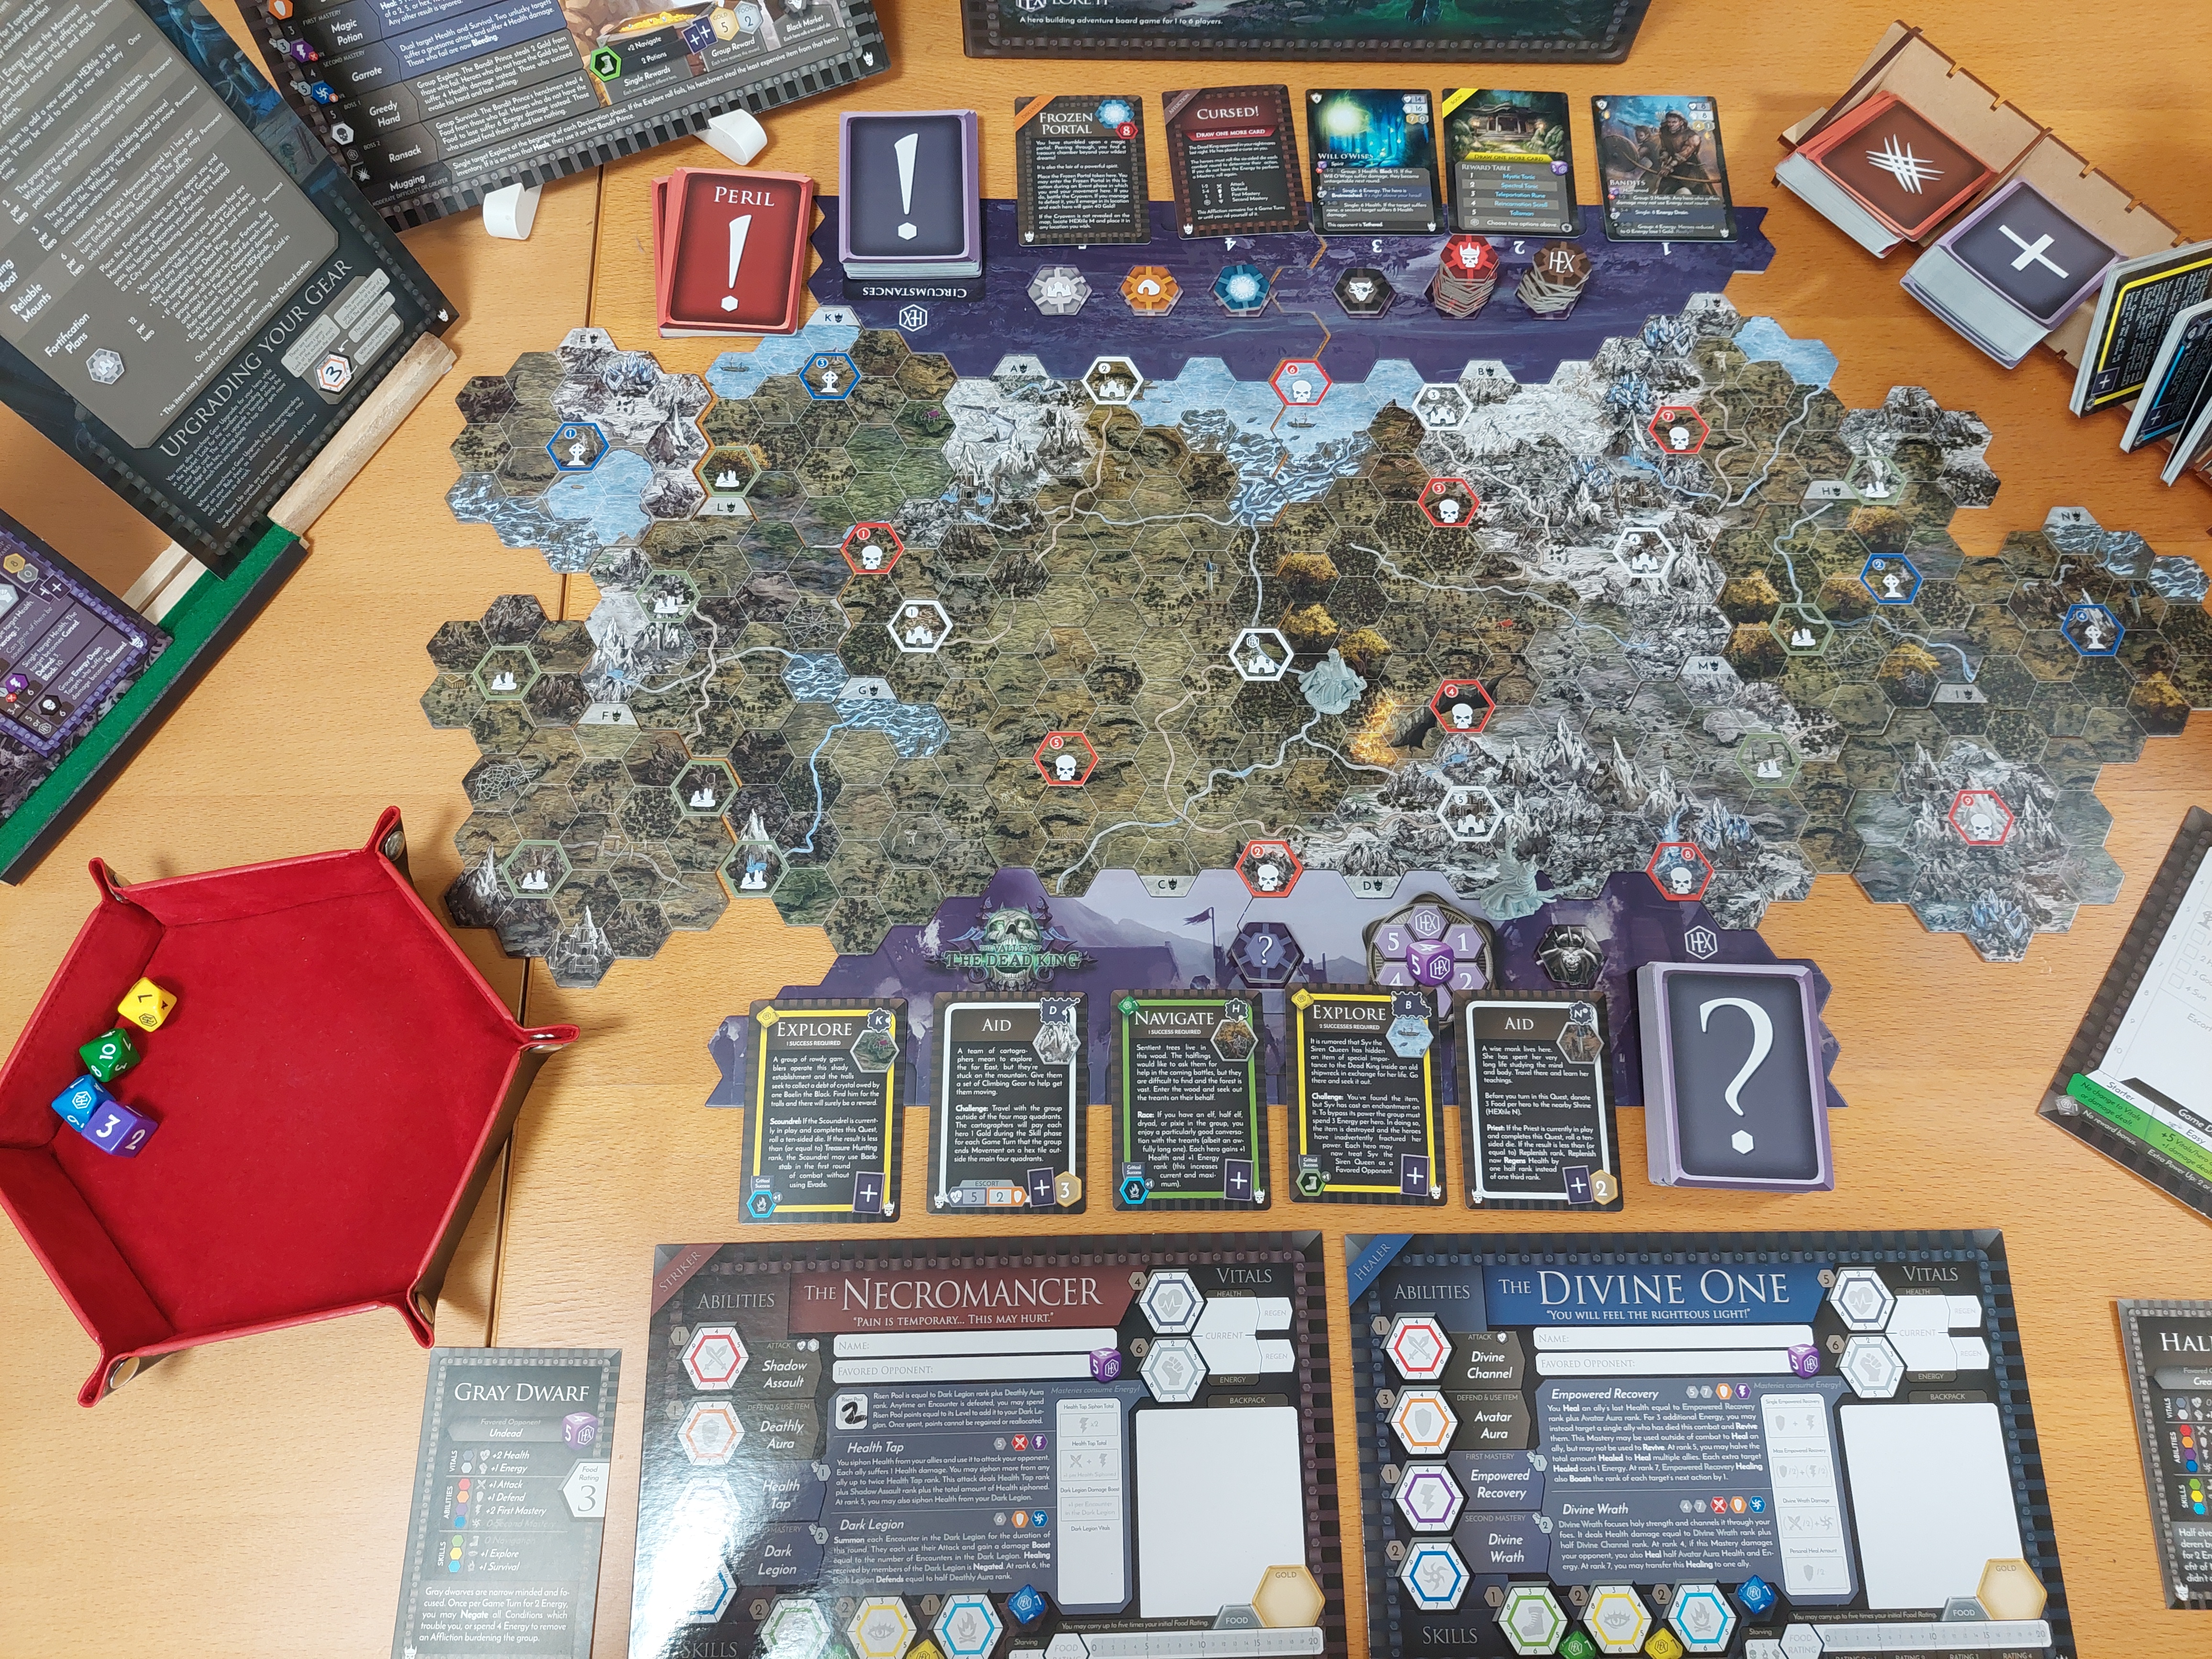
While I haven't played as many solo games recently as I'd like, I brought two games back to my kitchen table for solo runs. The first is an overland adventure 'Hexplore It: Valley of the Dead King' and the second a made-for-solo classic print-and-play -  'Iron Helm'. The former is an overland adventure, and the latter a push-your-luck dungeon delve.

I've written before about my initial experience playing Hexplore It: Valley of the Dead King (VoTDK). I had another run at the game a week or two ago, this time with some enhancements and added components that I'd tracked down. I went in with a few goals:
  1. Play a faster game and become 'smoother' with the core systems.
  2. Try some different race and role combos.
  3. Try to use the app more to track stats.
  4. Play a 'full map' variant.
I'm happy to say that all the bits I initially thought were fun were more so this time around.

Character Generation

One of the most attractive things about the Hexplore It system is character creation. There are lots of roles to choose from, and then mash up - either randomly or intentionally - with one of many races. I wanted to try something randomly, but still have a good two-handed solo run, so I chose a 'Striker' (fighter) and 'Healer'. Who did I end up with?

Meet my Grey Dwarf Necromancer, and Half Elf Divine One. Just for fun, I spent 5 minutes creating some images in Hotpot. AI.

Maladus 'Aren't you a bit tall for a dwarf?' Ironside

Maladus Ironside (as imagined by Hotpot AI)

So his trick is doing damage, but also being able to raise fallen opponents as an undead 'Dark Legion' which he can command to join the battle for a round. Here is his dry erase board:


Hexplore It Necromancer dry-erase board (front)

Hexplore It Necromancer dry-erase board (reverse)

Brimbildor 'Pretty boy' Silverhair

Brimbildor Silverhair (as imagined by Hotpot AI)

The 'Divine One' can use 'Empowered Recovery' to heal health, and also resurrect a fallen comrade in (but not outside) combat.

The Divine One dry-erase board (front)

Divine One dry-erase board (reverse) and Race cards

A little help from the app

In addition to rolling up the party and updating the dry-erase boards for them I also made a serious effort to use the app this time around, and it did make life pretty easy. For a free app, it works great most of the time and makes tracking most stats hassle free - combine a role and race and stats populate automagically, tap to increase/ decrease skills and health etc. 

As you can see from the images below, it looks quite 'busy', but hats off to the team for providing this. I can see that some people will really dislike the dry-erase system, and the app gives them a viable alternative. There are a few niggles, but overall great!

Click image to expand

Sadly, the team came to a quick (and sticky) end! 

I ended up starting my adventure far away from some of the best quests, in the Rokk'to encampment. Even when using a luck stone to get some new options, I had a lot of travel to do early on. To compound matters, the Dead King randomly entered the game on round 1 - arghhh, and THEN kept (randomly) choosing the next closest city to target for conquest, so he didn't have far to travel to consume his next victims. For each city he conquers, his power and speed increase. This meant that the endgame arrived quickly and I was too underpowered to face him. I hadn't completed many quests or grown in my own powers enough! 

On the way though, I...
...visited a dilapidated shrine near the mountains and received a Blessing of Good Fortune...
...travelled to some ancient ruins and had a fantastic adventure yet emerged unscathed (an awesome result by rolling a 1 on a D10 for some cool rewards)...
...defeated a bandit prince and was rewarded with the appearance of Bezzelquark's Black Market (another perfect role of a 1!)...
...explored some locations and solved some quests (not enough though!)

New components - Encounter Deck and Living Card deck

Despite falling to the Dead King I still had a good time. I got to use the 'Encounter cards' that are sold separately. These add (much requested) art to the different encounters you have, and they really make a difference to the look and feel of the game - very evocative!
Silk Spiders

Thugs

Mangy Wolves

'Opponents assemble!'

The 'Encounter Deck' also includes 'peril cards' which add dangerous but rewarding new challenges to choose from. I didn't get to a high enough level (or roll enough sixes) to choose them this time! (You can see them in the image below - the red exclamation cards in the image below at right).


I also used the 'Living Card Deck', which brings the online QR code-sourced quest lines into the game in card form. In this adventure, I didn't come across them.

Every hill and dale in view

Finally, inspired by Daniel over at 'The Dungeon Dive' (a YouTube channel I really enjoy), I played this game with almost all the map tiles out at the beginning. While that meant I didn't need to explore to find new tiles for quests, it was pretty thematic - Maladus and Brimbildor have lived in the valley all their lives - so they roughly know the lay of the land.

A small quality of life improvement for next time would be to use a die on each of the quest markers that get put on the board so I can easily tell which quest is which without hunting around.

Overall, I really enjoyed this overland adventure, and I'm looking forward to my next visit to the Valley. In the meantime, a much shorter underground experience is Iron Helm. I'll share more about that in my next post.

Cheers!


Thursday, November 24, 2022

Iron Helm - Dipping a toe into Print and Play


Just one more job

Iron Helm, a solo game by Grey Gnome games, has garnered a very good reputation among solo gamers as an enjoyable adventure. It has lovely retro art, a choice of older adventurers looking to pull off 'one more job' (as an older adventurer myself, there is obvious appeal!), and difficult choices to make at every junction...

...but new copies are basically only available from The Game Crafter, a print-on-demand website for games. Unfortunately, this doesn't work for me right now. I say this not because I have anything against that website or business choice. Put simply, with the current exchange rates and shipping (at of Nov. 2022), the base game (and add in an expansion or two) becomes a bit out of my reach. 

A core set of components (base game and 4 add ons) on the Game Crafter would cost $86.95 before shipping of $21.15, for a total of $108.10. (Ebay is similar, often with more expensive shipping). Just to be clear, for that price you are getting an excellent game, with good production values, a very sturdy box, and a huge amount of replayability. 

So, what to do?

Enter 'Print and play'. The idea is simple: pay a small amount, unlock and download a PDF file, and print locally, even on your home printer. Then cut out the components, and away you go - theoretically at a huge saving over the full game, while getting the same core experience (even if not professionally-made components.)

Fortunately Iron Helm is available in a pnp format. The creator, Jason Glover, has made the game available on the 'PnP Arcade' website: https://www.pnparcade.com/. There are 6 different PDF downloads available, each for a very reasonable price.
  • Iron Helm (base game.) $5
  • Loot & Lore Pack $2
  • Adventure Pack 1: Warren of Despair $2
  • Adventure Pack 2: Blackened Burrow $2
  • Adventure Pack 3: Crystal Caverns $2
  • Adventure Pack 4: Galnok's Labyrinth $2
Total: $15

Note that while this list does not equal the full amount of components on Gamecrafter (you'll find additional adventure packs there, although perhaps those will also be PnP in the future?). Mr. Glover has also posted some other free downloads on the Grey Gnome website (including the game mat files.)

Compare these two options (physical v. PnP), and that is a theoretical saving of about 93 USD, 'not including parts and labour'...read on to hear more about that.


Which door will you choose?


With this info in hand, I decided to take a first, hesitant step into the world of PnP. Was it really as easy as getting the files (saving a lot of money), busting out a pair of scissors, and enjoying a game?

Well...
...no!

However, that depends on how far you take the PnP experience. 
  • Keep it really simple? Cut out the paper, stick front to back, and play?
  • A middle-ground? Print in black/ white, cut out the paper, insert into sleeves, with a single loose playing card in the middle to stiffen?
  • Bling it up a bit to get closer to the printed game experience?  Print in colour, cut out, glue onto stiffeners, insert into sleeves.
I decided on the final option, and that meant a weekend of gathering materials, (struggling with) printing, cutting, and sticking!

After watching some videos to get some info (absolutely essential research!), I decided to avoid playing with just bits of paper, and shoot more for an actual playing card experience, with sleeved cards that have a bit of heft.

This involved:
  1. Printing:
    • A4 label paper. (Purchased 2 packs, total = 2,240 Yen/ 16 USD today.)
    • Home inkjet printer (owned)
  2. Cutting:
    • Craft knife, or roller-cutter (owned).
    • Metal ruler - to guide cuts (owned).
    • Cutting mat  - tape cardboard together if you don't have one (owned).
  3. Sticking:
    • 1~2 old decks of old playing cards - which your family won't miss! (owned). I stuck a single playing card to each PnP card, sandwiching that between the front and back. Steady hands and patience are a must here...(I have neither.)
    • Optional: Spray glue (aerosol glue.) If not using label paper this is a great way to evenly stick paper together (Purchased x1 = 110 yen)
  4. Sleeving:
    • I use 'penny sleeves'. You can get packs of 100 of these in most dollar stores ('100 Yen shops') in Japan. Larger stores will often have a wide range of sizes and style: loose fit/ tight fit, soft/ hard, matte on one side, etc. (owned)
Cost: (approx.)
  • PnP purchases: 980 JPY = 7 USD (Core game + Loot & Lore pack)
  • Colour copying: 750 JPY = 5.36 USD (x15 @ 50 yen each) 
  • Glue spray: 110 JPY = 0.78 USD (70 ml x1) 
  • A4 label paper: 2,240 JPY = 16 USD (x2 packs of 20, approx) 
Total: 4,080 JPY (approx. 29.14 USD)

Not included:
  • Printer ink: I didn't finish mine, but a new set for my printer is about 35.00 USD. I'll certainly means I'll have to buy more soon.
  • My time: Researching, buying, printing (and experimenting), cutting, sticking, tidying up, collating etc. took multiple hours over a weekend.

Hints for success

Here are some lessons from my first foray into PnP - learned the hard way:

1. Planning and gathering materials: 
    • Buy more paper than you think you need. You'll want to print a test page or two for a dry run, and if you are like me, you'll print on the wrong side of the label paper at least once. Also, working out printer settings can be a chore (resulting in more lost paper as you try to get the size right.)
    • Use a 'dry run' to work out your process. With a bit of thought you can streamline the process to do multiple cards at once, or learn the best order in which to make you cuts etc.
    • Don't buy pre-formatted sticky label paper. This has different sizes/ cuts (e.g. for business cards, labels etc.). Just get the full A4 size sheets without perforations etc.
    • Cutting mats can be home-made. If you don't have one you can tape layers of cardboard together to make a thick cutting surface. This should survive making one PnP game, and can then be recycled. Make sure you make it really flat though...
    • Playing card colours. If you are going to sandwich these into your home-made cards, think about the colours and design of the playing cards. Will they show through? Think about what you are comfortable with and plan accordingly. Your grimdark card game doesn't feel quite so serious with the Little Mermaid peeking through at you...
    • Spray glue is your friend. Depending on where you live, this can be expensive and you need to plan for using it in a well-ventilated space. You don't want to get this stuff in your kitchen or office.
    • Compromise for peace of mind. In some games, tokens are an essential part of gameplay for tracking various statuses. Iron Helm has lots of them. For a print and play they can be really fiddly - small, time-consuming to cut and glue. Do you need them? Can alternatives be used? A trip to the dollar store can provide beads, dice or other items that can be used to track health, gold, encumbrance etc. 
For 3 USD, these beads can be used for health, energy,
or anything where a cube is needed (use the letter cubes. e.g. 'G' for gold)


2. Printing:
    • Do a 'dry run' to check how things work before committing to a particular method.
    • Always print test pages and check the sizes. e.g. Many US PDFs are in 'Letter' size, and you may not have this kind of paper where you are. Don't print everything at once until you have this sorted out!
    • A home inkjet printer is fine but... don't expect perfectly deep blacks. Be realistic about the results. If you have a cheap inkjet printer, you might get 'banding' and not entirely uniform blacks. Are you OK with that? 
    • Do expect to use a lot of ink. Depending on the amount of content in the PnP (in Iron helm, this is at least 30 sheets of cards and tokens.) you could really burn through your ink cartridges. This is one of the main 'hidden' costs of PnP, depending on what level of professionalism you are looking for. 
    • Don't forget the convenience store. If you want a more professional look consider the excellent quality that industrial copy machines have. In Japan, almost every convenience store has one of these. The cost can be worth it for a more professional look, however x1 A4 colour page is 50 JPY. Not cheap! A compromise is to use this for some components or sheets only (e.g. that are mainly black, or that you will use a lot). 

3. Cutting:
    • A paper cutter with guide rails is ideal for doing high-quality cuts for large numbers of cards. However, if you aren't going to do a lot of PnP it can be a comparatively large additional investment (12 ~30 USD) for one game. But, it is much faster, more convenient, and accurate than a craft knife. (Especially if cutting multiple sheets at once.) You can get really cheap ones, but they often don't have large guide rails to ensure accurate cuts, or lack some other useful feature.

4. Sticking:
    • Playing cards really up the game. I stuck a single playing card to each PnP card, sandwiching that between the front and back. This acts as a stiffener and makes the cards feel much better in the hand and easy to use and play with. Watch out though - steady hands and patience are a must here...(I have neither!) As above, do a 'dry run' to check how things work before committing to a particular method.

The adventure begins...

After a weekend cutting and sticking, I ended up with a final result that I am really happy with and excited to use. The cards are more than good enough to play with, and with the playing cards as a stiffener and the penny sleeves these should last me a good long time. 

I hope you enjoy the photos below! Thanks for reading.

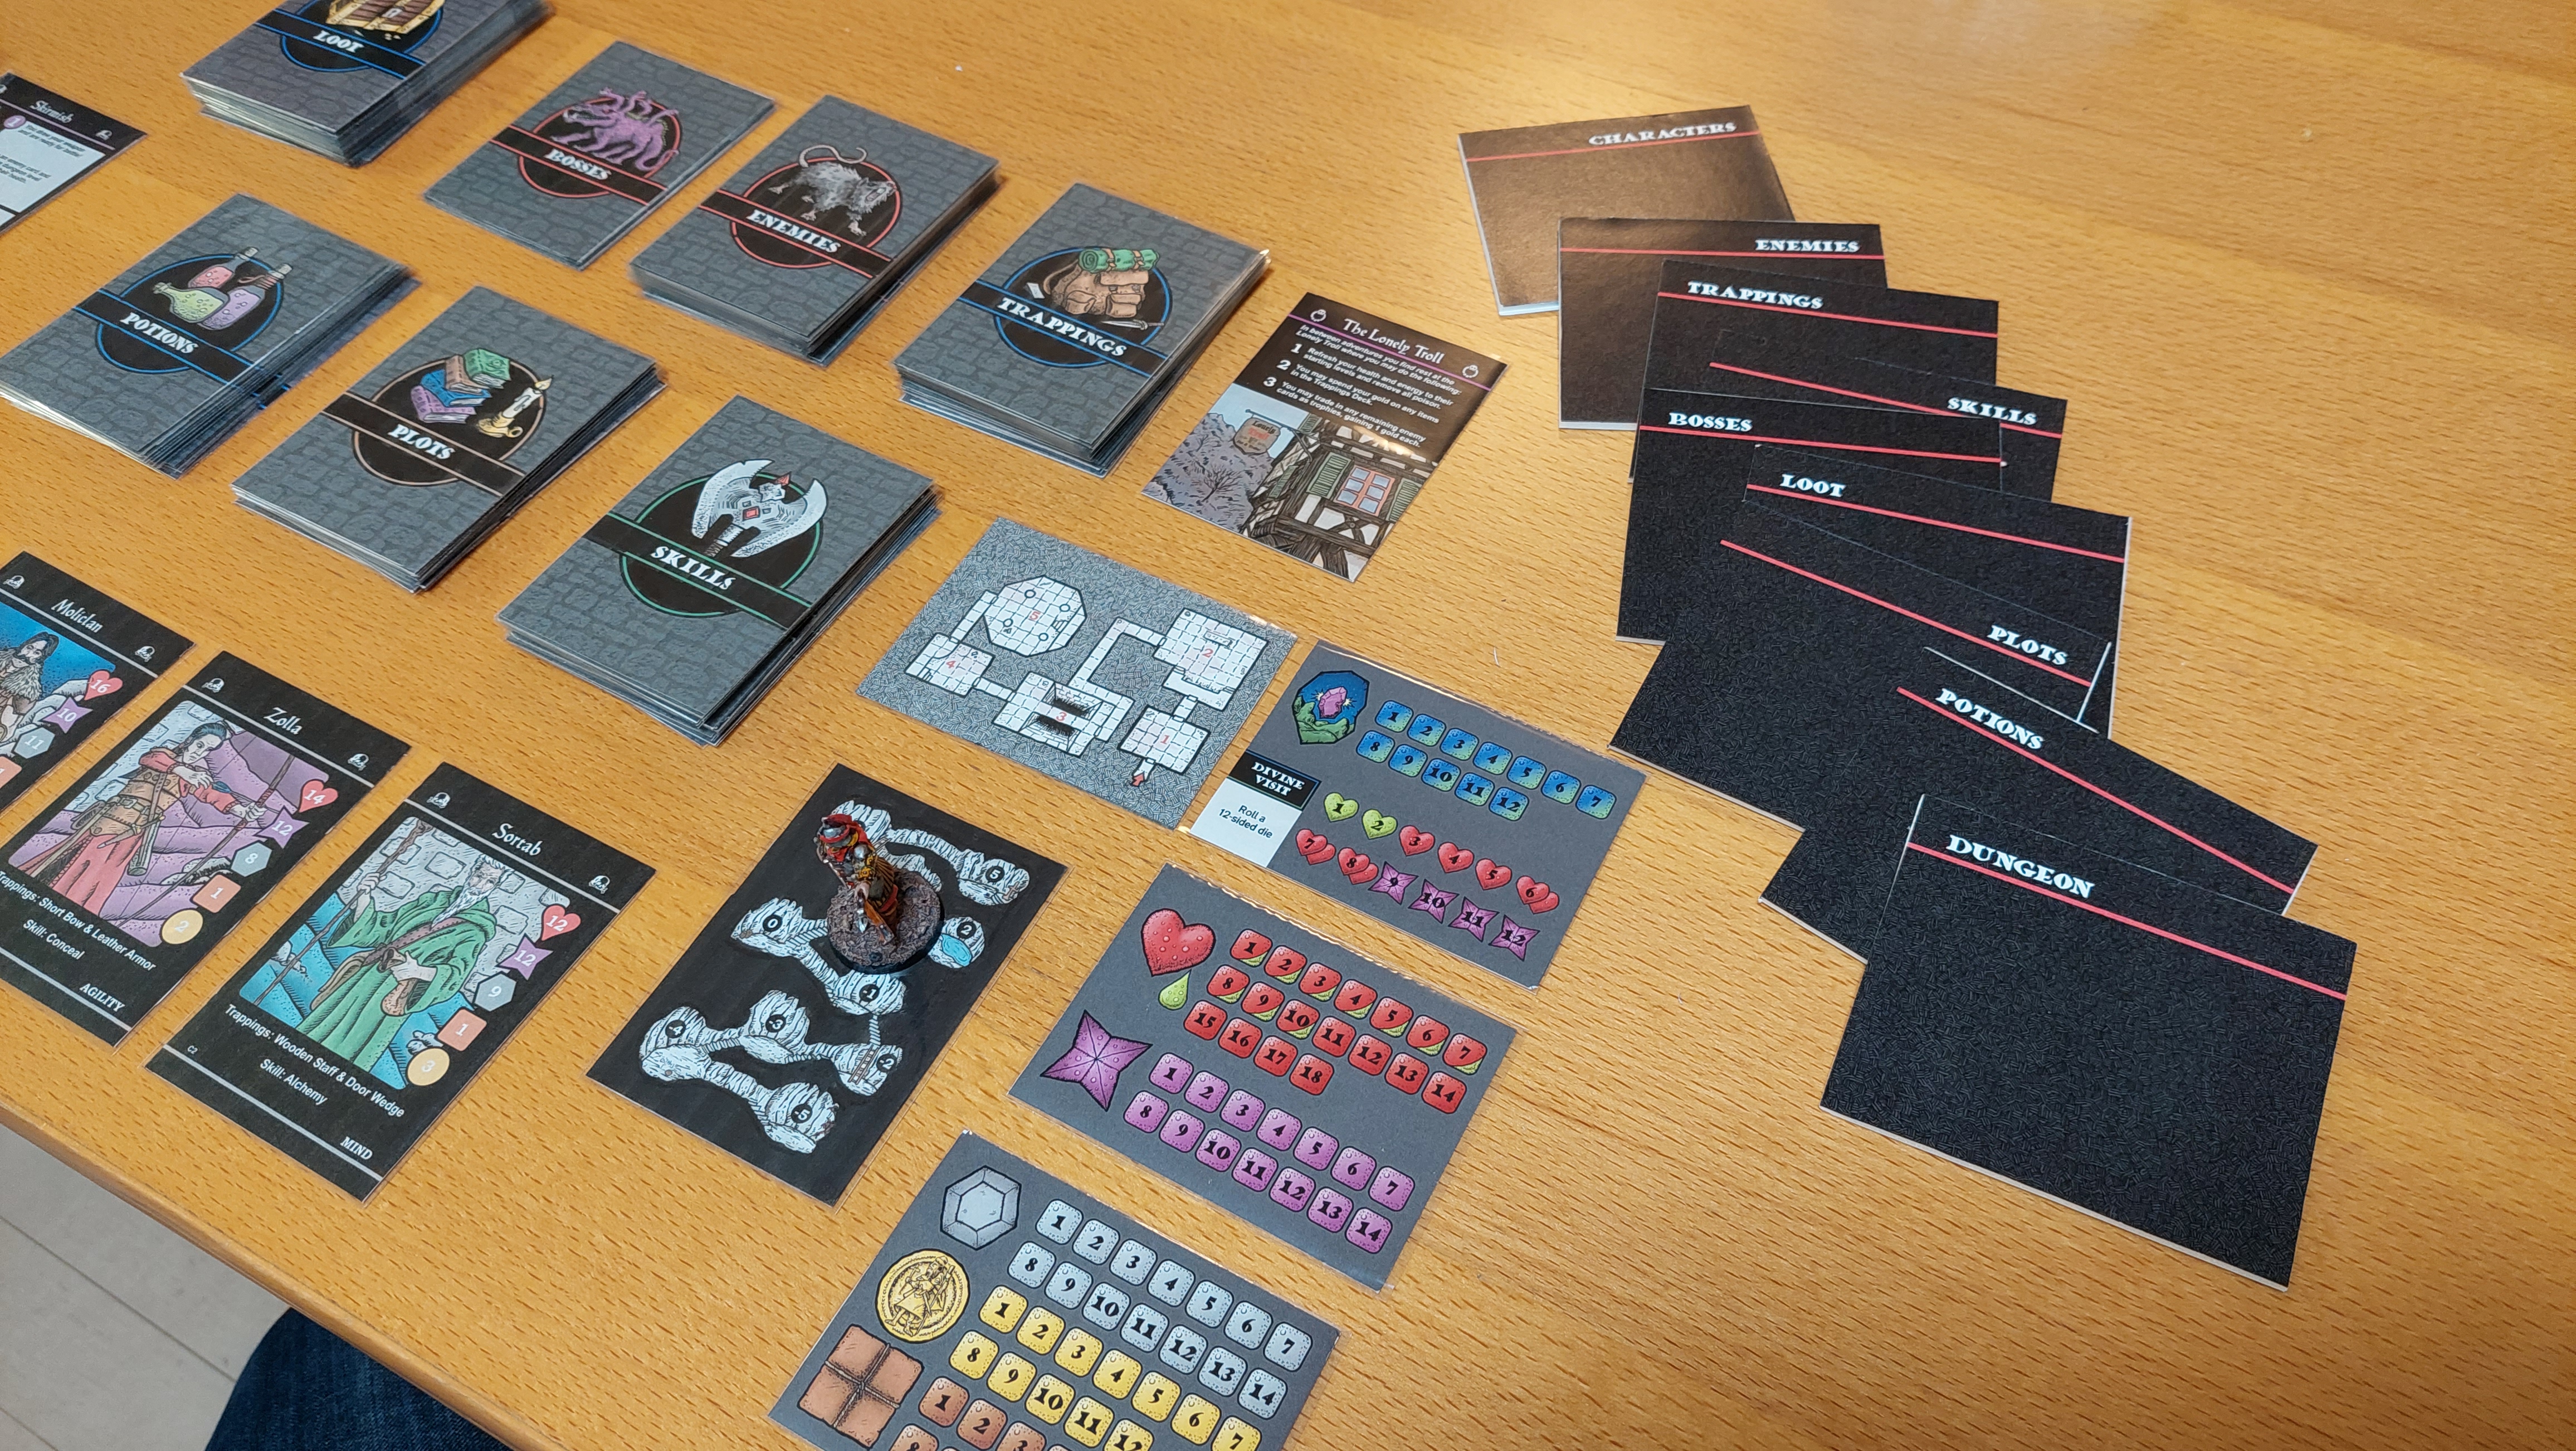
Tracking cards, mini, and components

Dungeon card pile and door options. Which to choose?

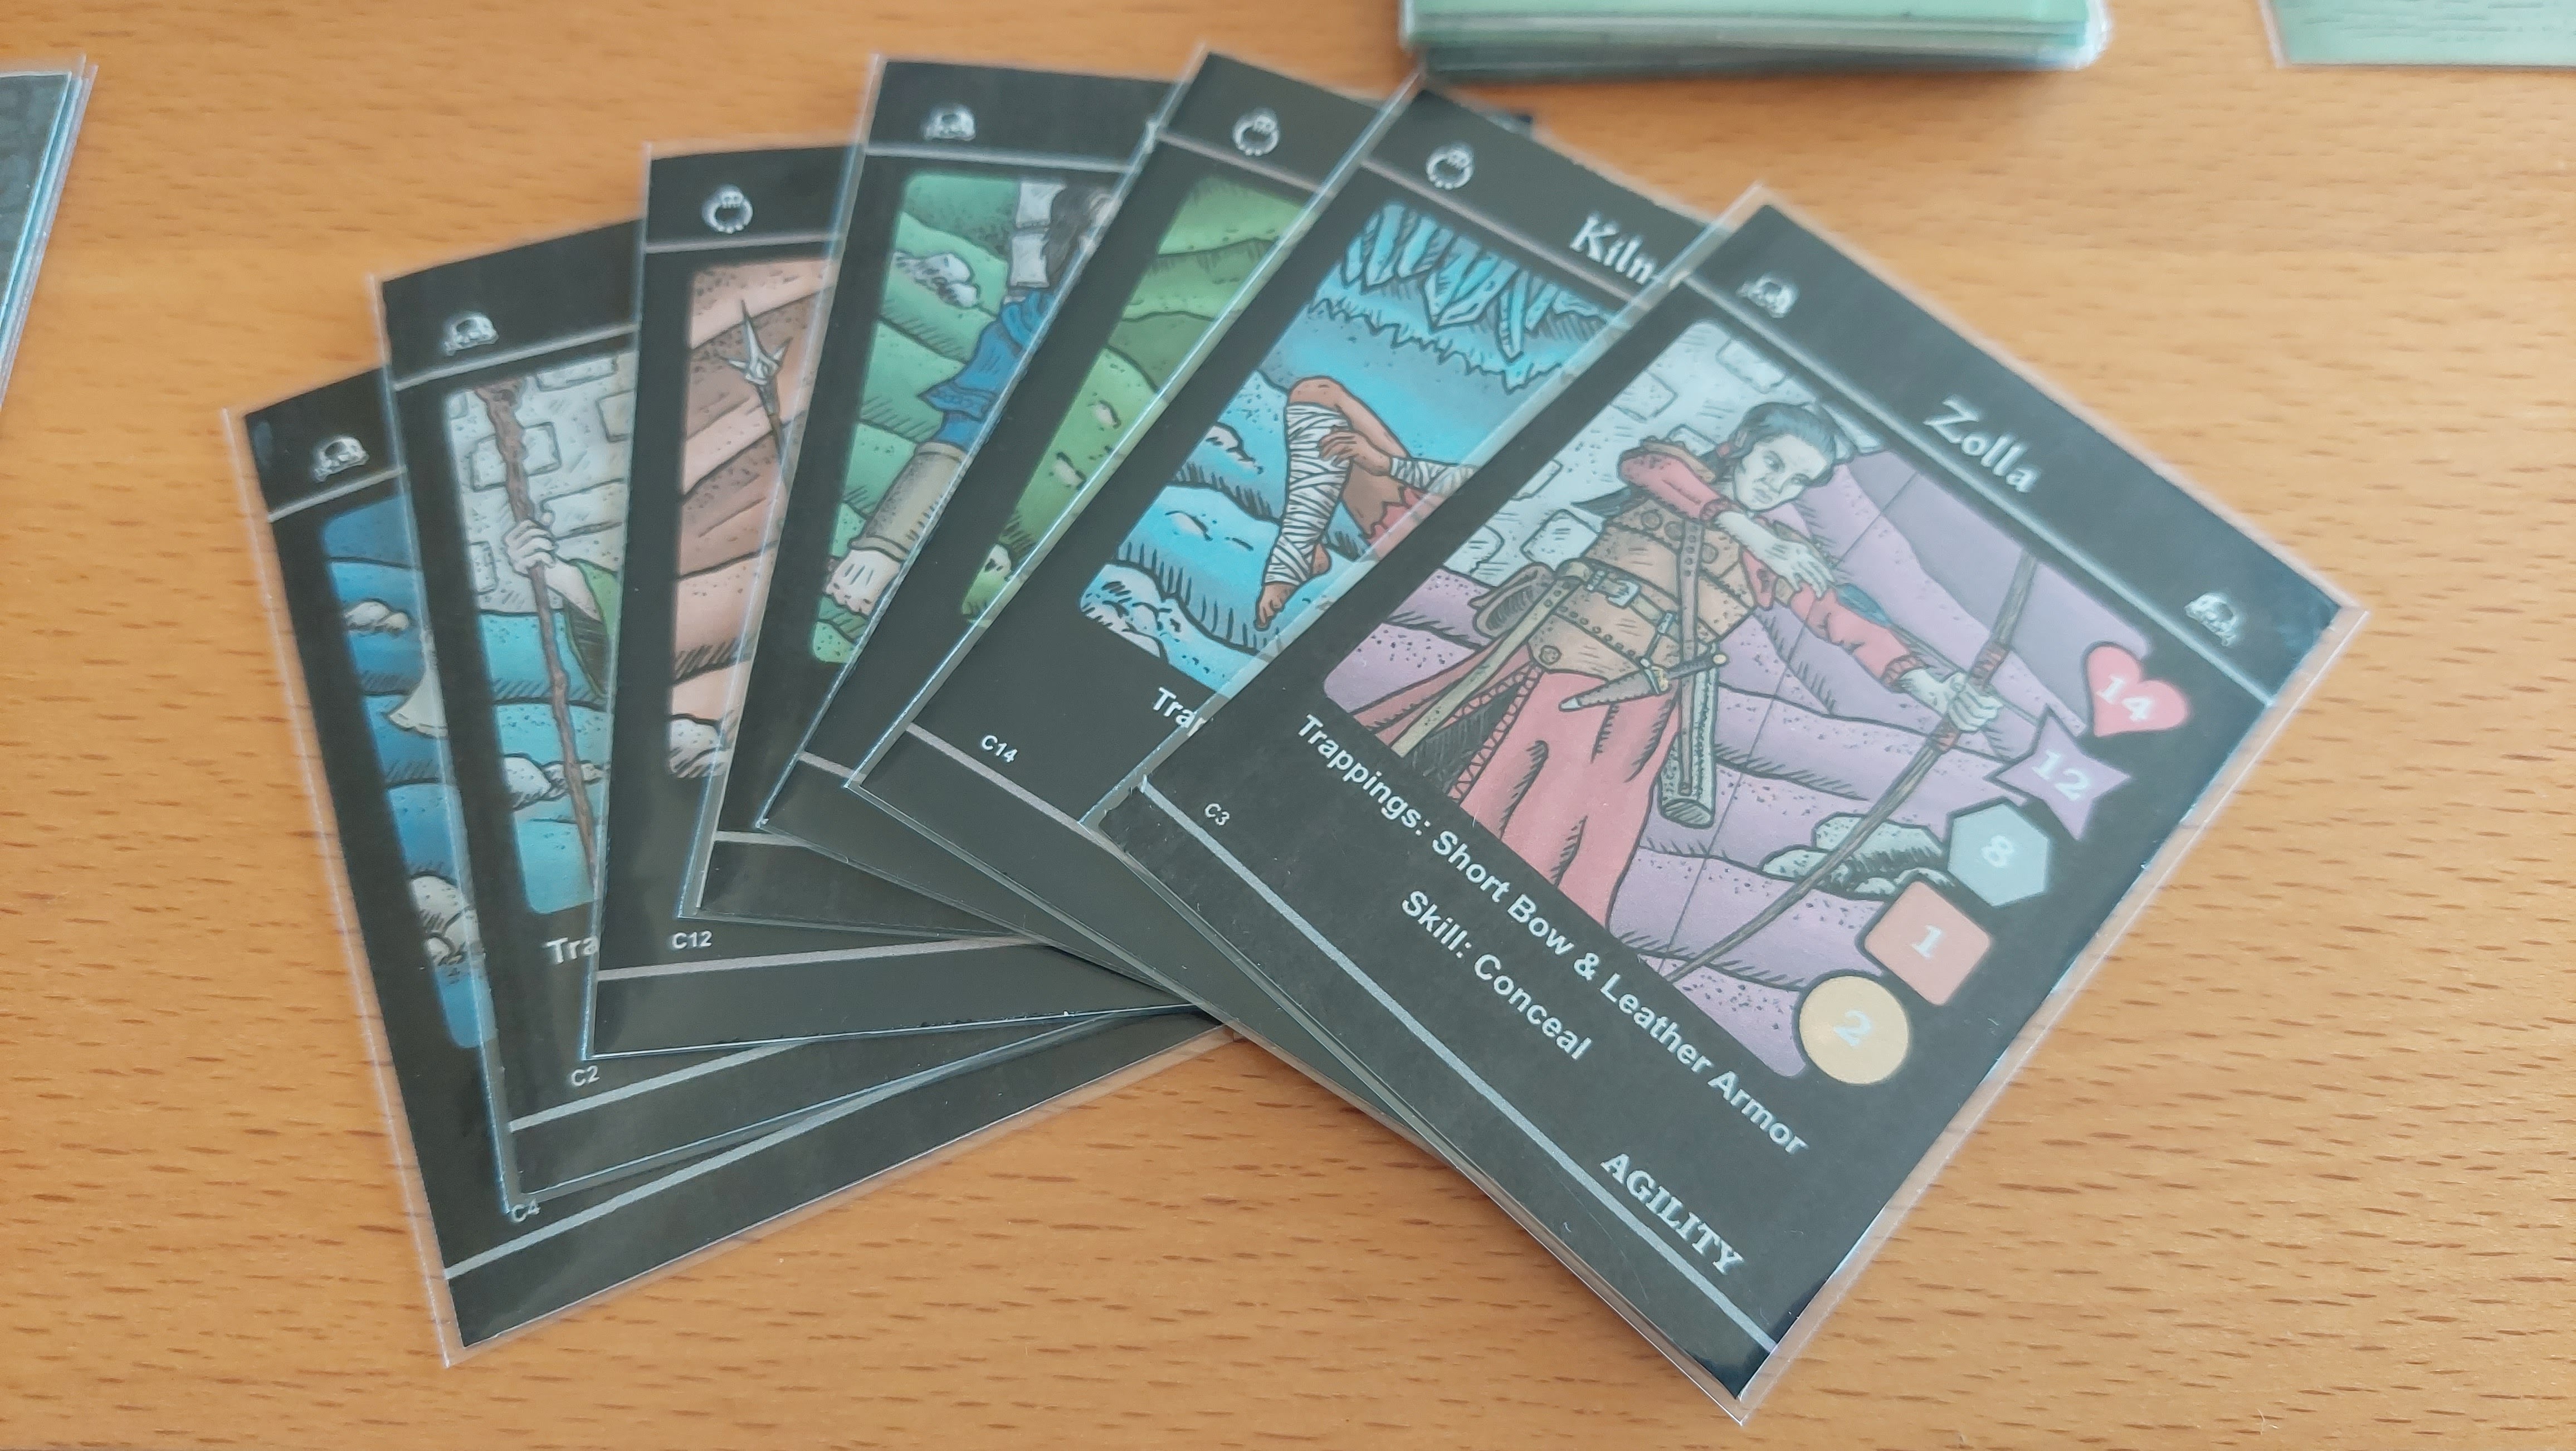
Character with trappings (equipment) and skills

Skills, trappings, and potions cards. Also card dividers (R)

Four characters, three of which (from left) from Loot & Lore pack

More characters, archer, wizard, fighter etc.

Lots of components

Tracking cards, maps, and morale.
The 'Comprehensive Resource tracking cards are from Boardgame Geek'

These lovely 'Comprehensive Resource Tracking Cards' are from 
Boardgame Geek, created by Karsha


Related Posts Plugin for WordPress, Blogger...