Showing posts with label High Elf archers. Show all posts

Thursday, July 19, 2012

How to Paint High Elf Archers

*Squeek*

Below is a fairly simple step-by-step guide to painting High Elf Archers. These were one of the first units I painted in the Sons of Xereus. Hope you find it useful!

EDIT: Following the launch of the latest Citadel Paint range in 2012, please note that the colours listed below are from the previous range. I hope to have time to rewrite in the future, but for the time being, you can use the conversion chart/ list I made here or use the official Citadel Conversion chart here.

Paints used:

  • Skull White
  • Snakebite Leather
  • Bleached Bone
  • Chainmail
  • Mithril Silver
  • Dark Angels Green
  • Snot Green
  • Liche Purple
  • Warlock Purple
  • Calthan Brown
  • Tallarn Flesh
  • Dwarf Flesh
  • Elf Flesh
  • Sunburst Yellow
  • Dwarf Bronze
  • Codex Grey
  • Fortress Grey

Washes:

  • Gryphonne Sepia
  • Ogryn Flesh
  • Badab Black
(Wow, I can't believe that I used that many different colours on a model that looks so simple...but I did!)


Step 1: Preparation.

Assemble models.
Use a craft knife or file away flash/ mould lines (carefully!)  With archers in particular make sure you pay attention to this on their robes and bows, as mould lines really show up later when painted if you don't get rid of them!


Step 2: First basing.

Sand down any flash or raised areas around the edge of the base. 
Apply PVA glue to the top of the base, being careful not to get this on the boots of the model. (For variety, consider sprinkling a couple of pieces of crushed coral onto the PVA before the sand.)
Immediately dip the base into modelling sand.

TIP: Rub away any sand or glue that has dripped over onto the sides of the base now if you prefer a nice (clean-looking) base later.


Optional: Finish off the bases now (see Step 8, final basing).


Step 3: Undercoat.


Spray paint the model(s) using the undercoat of your choice. I use Citadel Chaos Black. Many people prefer a Skull White undercoat for brighter models like High Elves as the overall effect will be brighter and you will need far fewer layers of Skull White later on robes etc. 
However, I often use black as it hides mistakes etc.


Step 4: Basecoats.


Codex Grey: Robes (this will be an undercoat for the Skull White later.)

Chainmail: Bracelets/ bracers, helmets, details on bow, swords.
Bleached Bone: Bow stave, bow case, hair, pouches.
Snakebite Leather: Belt, shoes.
Liche Purple: Sleeves.
Dark Angels Green: Gems
Tallarn Flesh: Skin.
Calthan Brown: Unit standard pole.
Dwarf Bronze: Musical instrument.

TIP: I didn't do the Skull White robes until after washes (step 5 below) had been done.


Step 5: Washes.
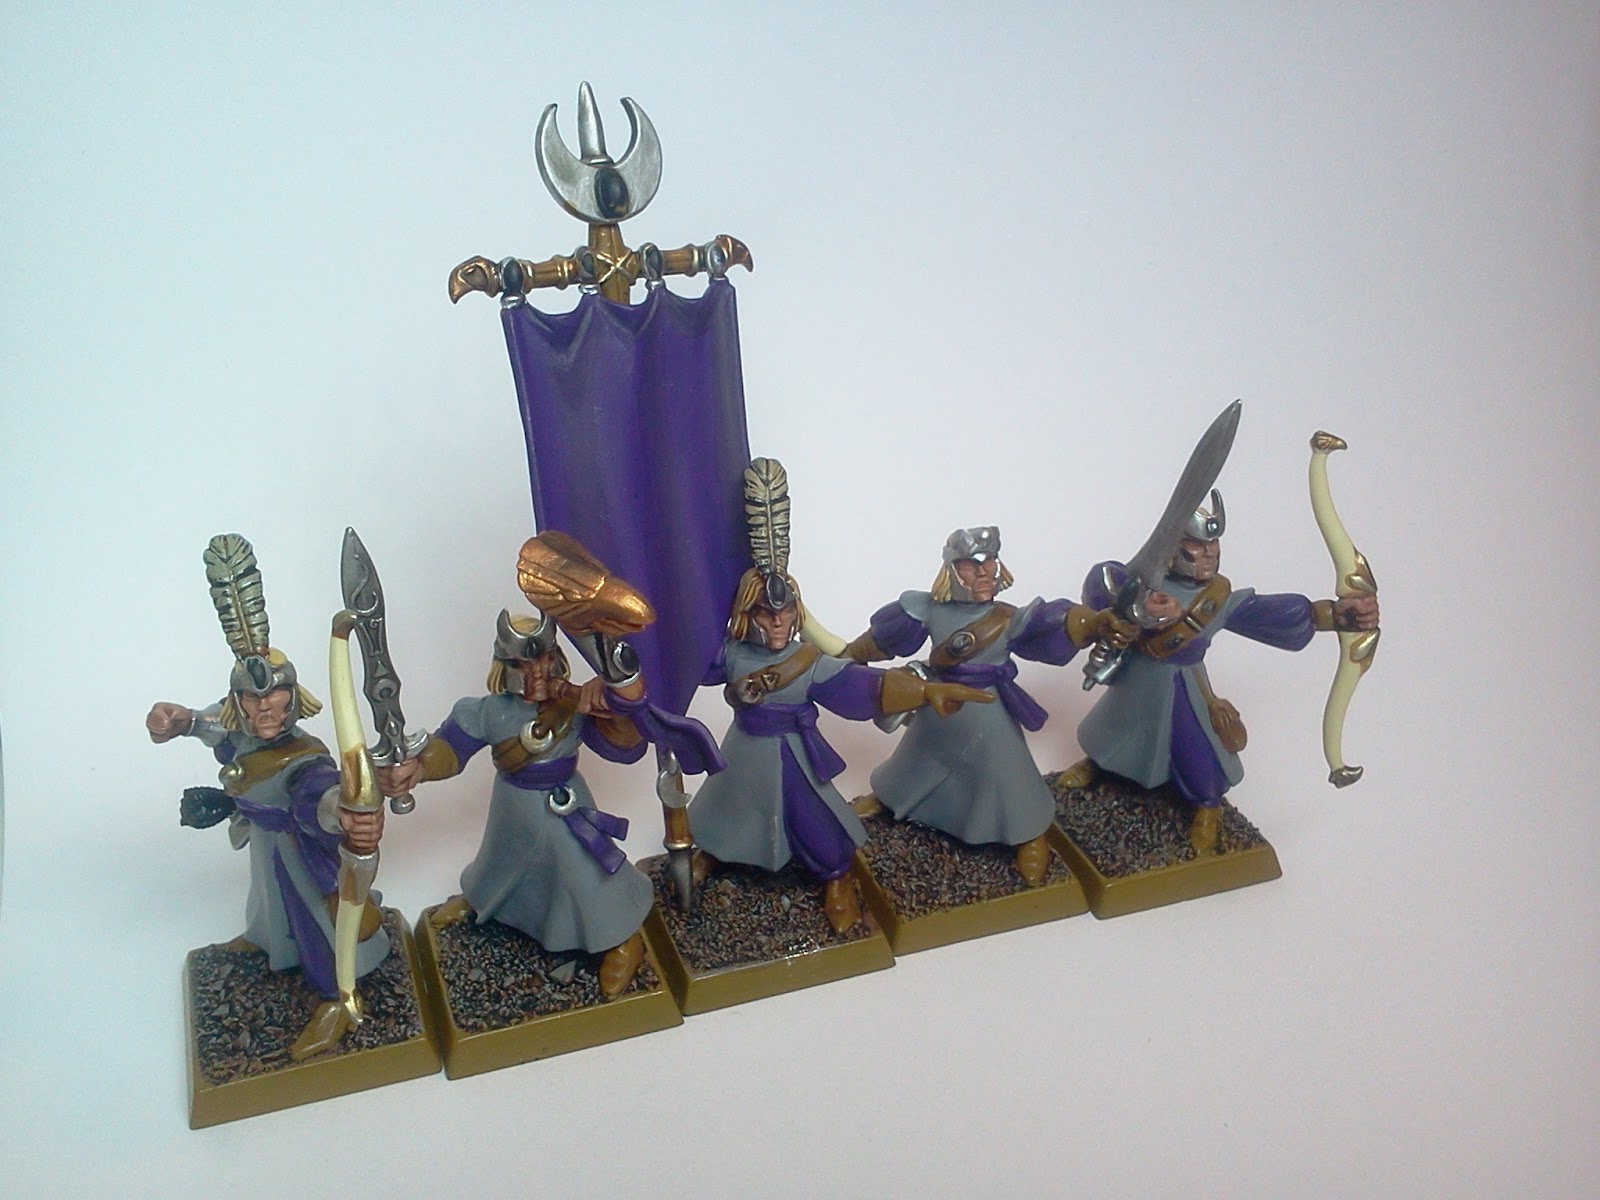


Ogryn Flesh: Skin

Devlan Mud: Sleeves, belts, shoes, (leathers)
Gryphonne Sepia: Hair, details on bow, bow case.


Step 6: Layers.


Skull White: Robes (leave Codex Grey in the folds to provide some shading.) If using Skull White, be prepared to use many, many thin layers. 
TIP: Don't be tempted to do thick layers though, the end effect won't look very nice.

Liche Purple/ Warlock Purple mix (50/50) on sleeves. Layer this up to a purer Warlock Purple to provide highlights on the raised areas of the sleeves (30/70) 
Bleached Bone: Bow, edges of bow case, strands of hair
Tallarn Flesh/ Dwarf Flesh mix (50/50)
Dark Angel Green/ Snot Green mix: Gems. (70/30 mix, layering up to a 30/70 mix along the bottom edge of the gem)
Dwarf Bronze/ Shining Gold mix: (50/50) on the musician's instrument.

TIP: To make your gems really stand out, consider adding a tiny dot of pure Skull White at the top and/ or bottom of the gem.


Step 7: Drybrushing.

Codex Grey or Skull White drybrushed on the arrow fletchings.


Step 8: Final basing.

Calthan Brown: Overbrush across the base, being careful to avoid the boots/ legs of the model.
Snakebite Leather: Drybrush across the base. Paint the base edges. I usually find 2 coats gives a nice smooth finish.
Codex Grey: Drybrush lightly across the base, paint any crushed coral.
Fortress Grey: Drybrush any crushed coral rocks to add a natural highlight. Paint on PVA glue, and then sprinkle static grass onto the base.

I think that is it!


Cheers,
*Squeek*

Saturday, May 12, 2012

High Elf Army Update Photos

*Squeek*

With a busy work week and travel I haven't posted much this last week. However, before hitting the road I managed to take a few photos of the growing (but still small!) High Elf army that I am painting as a birthday surprise. As the kids were out, I threw down my GW battlemat and got out my camera.

This is the first time that I have put the units I have painted so far together to see how they look.

Photos below - with a few more comments later...

High Elf Spearmen
High Elf Spearmen
High Elf Spearmen Command
High Elf Archers (Forgot to do the eyes!)
High Elf Archers (Gems)
High Elf Archers
High Elf Mage (Front)
High Elf Mage (Cloak detail)
High Elf Repeater Bolt Throwers
High Elf Army (Eagle's eye view?)
High Elf Army (Battleline view?)
High Elf Army 
High Elf Mage
I only have a couple of weeks total painting time left, and even that means just a couple of hours per night, so I am going to have to motor on through to finish a reasonably sized army. To do that, I reckon I need to do at least 2 more units - High Helms (5-8?) and Swordmasters (minimum 10, but 20 if I can!)

Hope I can make it!

Thanks for visiting,
*Squeek*

Monday, April 30, 2012

High Elf Archers Update #6

*Squeek*
Got back from a day out yesterday in Tokyo and did some work on the Archers. 
"Golden Week" is just beginning in Japan, so a lot of people have left Tokyo for their hometowns...
... it was still a bit crowded, but Asakusa was still a great place to visit.


The previous night I had put some static grass across the bases, and last night I did most of the gems in one sitting. For the sake of simplicity I did the whole lot as green gems, using the usual technique:

  1. Dark Angels Green.
  2. Snot Green highlights.
  3. Snot Green/ Skull White highlights (70/30)
  4. Snot Green/ Skull White highlights (50/50)
  5. Pure Skull White spots at the top of each gem.
This morning I took a couple of quick snaps when my kids were taking the rubbish out. I only had a few minutes so I didn't set them up properly, but I hope they give you the idea (yeah, the kitchen table-cloth is a bit garish I know...)


In reality, they look a bit better than this because these photos are taken way too close! (Even if I do say so myself...cough! cough!) From a couple of feet away the unit seems to "come together" a bit more because the eye can't pick out all the problems. This is a key point if you are working on something that is for the "Tabletop" and don't have much experience with a particular unit or are new to painting. Often you can get half-way through a unit and get a bit depressed by all the little errors and problems on individual models, but remember, these will "disappear" into the unit when you have them next to each other, ranked-up, and based.

Still to do:
- Eyes
- Metallic highlights (swords, buckles, instruments etc.)

Cheers,
*Squeek*

Saturday, April 21, 2012

High Elf Archers Update #5

*Squeek*

As planned earlier in the day, I got home and put in a couple more hours on the High Elf Archers. 

More info after the photos...
(Due to this being a  "Secret birthday gift" for my kids I can't take photos during the day so these haven't come out well - and as I am trying to rush a few snaps late at night I haven't setup any decent lighting.)


Command
Musician
Hawkeye
Standard Bearer

Archer (Rank and File)
Building on the layers done yesterday, I added a layer of pure Warlock Purple to the purple robes across all 20 members of the unit. I also started to layer up the unit standard as well. This final layer really makes the unit brighter! (Almost too psychedelic, but hey, it's my kid's favorite colour!)

I have to say that it usually takes a week to do a Clanrat unit of about 40 models, so the amount of time it is taking me to do these guys has surprised me. I think the main reasons are:

  1. The Skull White robes. I should definitely pick up some Ceramite White if it provides full cover in only one layer (but I am worried if that will mean the rest of the army will look slightly different from the archers and spearmen I have already done.)
  2. The details. Put together the headbands, belts, details on the bows and quivers etc and it adds up!
The good news is that I feel the robes and cloth are now done and I can move onto other areas.

Still to do:
  • Gems.
  • Drybrushing/ Highlights on everything. (Leather, skin etc.)
  • Static grass
  • Eyes (I HATE doing eyes, but hopefully it will get easier with practice.)
  • Unit logo on the battle standard
  • Movement tray
With a busy work schedule coming up I doubt I will get any painting done for another week or so now, so this may be my last update for a while...

Cheers,

*Squeek*

p.s. I don't know how you like to relax while painting, but for me it is usually listening to documentaries. From this week I can recommend The Roman War Machine series. I am not always a big fan of the History Channel, but I love the way these re-enactors are so into their roles...

Friday, April 20, 2012

High Elf Archers Update #4

*Squeek*
Well I have been managing a couple of hours a night on these guys this week so these updates are coming pretty fast. This may be my last update in a while though due to a busy work week coming up...

Last night I got four things done across the whole unit.
  1. Another layer of Skull White on the top half of the robes.
  2. Some tidying up of lines between shoulders, robes etc for neatness.
  3. A layer of Liche Purple/ Warlock Purple mix. (70/30)
  4. A second layer of Liche Purple/ Warlock Purple mix. (50/50)


 Next time should see a final lighter layer of Warlock Purple, and then on to layers on the skin and leathers. That will be capped off with detailing (Gems etc), more highlights and then final basing.
It feels like the end is in sight! Some photos below. (I'm uploading this from the subway via Blogger Mobile, so image quality may be poor...)
Cheers,

*Squeek*


Related Posts Plugin for WordPress, Blogger...