Showing posts with label High Elf Spearmen. Show all posts

Saturday, May 12, 2012

High Elf Army Update Photos

*Squeek*

With a busy work week and travel I haven't posted much this last week. However, before hitting the road I managed to take a few photos of the growing (but still small!) High Elf army that I am painting as a birthday surprise. As the kids were out, I threw down my GW battlemat and got out my camera.

This is the first time that I have put the units I have painted so far together to see how they look.

Photos below - with a few more comments later...

High Elf Spearmen
High Elf Spearmen
High Elf Spearmen Command
High Elf Archers (Forgot to do the eyes!)
High Elf Archers (Gems)
High Elf Archers
High Elf Mage (Front)
High Elf Mage (Cloak detail)
High Elf Repeater Bolt Throwers
High Elf Army (Eagle's eye view?)
High Elf Army (Battleline view?)
High Elf Army 
High Elf Mage
I only have a couple of weeks total painting time left, and even that means just a couple of hours per night, so I am going to have to motor on through to finish a reasonably sized army. To do that, I reckon I need to do at least 2 more units - High Helms (5-8?) and Swordmasters (minimum 10, but 20 if I can!)

Hope I can make it!

Thanks for visiting,
*Squeek*

Sunday, May 6, 2012

How to Paint High Elf Spearmen

*Squeek*

Please find some pictures and a step-by-step guide below for High Elf Spearmen. As usual there is no assumption on my part that I am a "good"painter! This is just (roughly) what I did to get the effect below, which I reckon is "Tabletop Quality".
Note: The process described below is not exact, I recommend painting up a test model first. Also, this guide uses the "Old" Games Workshop paints. Please see this Games Workshop conversion chart for the approximate equivalents in the new range.


Before battle, marshal your forces...
Paints:
  • Chaos Black undercoat (spray) 
  • Chaos Black
  • Skull White
  • Bleached Bone
  • Codex Grey
  • Boltgun Metal
  • Chainmail
  • Mithril Silver
  • Calthan Brown
  • Snakebite Leather
  • Liche Purple
  • Warlock Purple
  • Tallarn Flesh
  • Dwarf Flesh
  • Elf Flesh
  • Dark Angels Green
  • Snot Green
  • Dwarf Bronze
  • Shining Gold
Washes:
  • Devlan Mud
  • Ogryn Flesh
  • Badab Black
  • Gryphonne Sepia
(I use GW only because they are an easy range for me to get hold of. There are lots of good hobbying paint ranges out there.)

Step 1: Preparation.

Assemble models.
Remove flash/ mould lines. Use a craft knife or file away (carefully!) With these models, pay careful attention to mould lines on top of their boots and also down the side of their scale armour hauberks, helmets and spears.

The "Shield Factory"!

Tip: You may want to consider NOT attaching shields at this point. I painted mine in "assembly line" fashion and glued them on later. This is fiddly but gives easier access to the body of the model and the reverse of the shield during painting.

Step 2: First basing.

Sand down any flash or raised areas around the edge of the base so it is smooth.
Apply PVA glue to the top of the base, being careful not to get this on the boots of the model.
Sprinkle a few pieces of crushed coral onto the base (you can buy this at any pet shop in the aquatics section)

Immediately dip in modelling sand.


Tip: Rub away any sand/ glue that has dripped over onto the sides of the base now for a smarter appearance later.

OPTIONAL: At this point, I sometimes do some initial work on the base now (overbrush the sand and paint the edges) rather than leave this to the end of the process (See Step 7: Final Basing). I would then leave the static grass until the end. (I just do this because I don't like finishing the models and then still having another hour of drudgery on the bases!)

Step 3: Undercoat.

Spray paint the model(s) using the undercoat of your choice. I use Citadel Chaos Black
Note: A debate exists over whether to use Chaos Black or Skull White. As a beginner I prefer Chaos Black as it hides my mistakes and forms natural shadows all over the model. However for brighter models like High Elves there is much to be said for a white undercoat - not least because it greatly reduces the number of Skull White layers needed later...


Tip: when spray undercoating the model, make sure you get good coverage on the sides of the base too. This makes it easier to paint later.

Step 4: Basecoats.

Codex Grey basecoat on robes (Unit Champion)
Basecoats complete (Unit Champion) and a
layer of Skull White on the arms.
Basecoats complete (Spearman)
Codex Grey: Robes. (This will form an undercoat for the Skull White in step 6.)
Boltgun Metal: Shield bosses.
Chainmail: Armour, helmet, details on musician's instrument, fittings on banner. Note: If youare in a hurry or doing a very large unit, scale armour is easy to drybrush, as this naturally leaves shading in the recesses between the scales.
Mithril Silver: Spearhead, swords etc.
Calthan Brown: Spear haft. (This will be a basecoat for the Bleached Bone.)
Snakebite Leather: Boots
Liche Purple: Edges of hauberk/ icons on breastplates/ unit banner
Tallarn Flesh: Skin
Dark Angels Green: Gems
Dwarf Bronze: Scale hauberk on unit champion, musician's instrument, fittings on unit banner.

Skull White: At this point, I began working on the white shields. It took 3-4 layers per shield.


Tip: If you want, add a bit of variety to the unit by having a few troops with different shields. In my case I did 3 different designs as a test, ultimately keeping the purple shield for the champion...
Test shield designs. (Liche Purple, Skull White and Warlock Purple)
I varied the gem colours too. These are held in place with Blu-Tack at this point.

Step 5: Washes.

Ogryn Flesh: Skin (face, hands)
Devlan Mud: Back of each shield.
Gryphonne Sepia: Musician's instrument
Badab Black: Scale armour, breastplates, helmets, shield boss.


Step 6: Layers.

Shining Gold: Fixtures and fittings on helmets, fittings around gems on shield bosses and unit standard.
Skull White: Robes. (Leave Codex Grey in the folds of the robes to provide some shading.) Eyes.
Chaos Black: Pupils. (Try to add just a tiny dot to the center of the eye) To be honest - I find the eyes the hardest thing to do!
Liche Purple/ Warlock Purple mix (50/50) Edges of hauberk/ icons on breastplates/ unit banner. Layer up with an intermediate mix (30/70) to a pure Warlock Purple

Bleached Bone: Spear hafts, musician's instrument.
Dark Angel Green/ Snot Green mix: Gems. (70/30 mix, layering up to a 30/70 mix along the bottom edge of the gem)


Tip: For gems, a small dot of pure Skull White at the top and/ or bottom of the gem adds a very nice effect and makes the gem stand out.
Gem detail.

Step 7: Drybrushing

Mithril Silver: Breastplates, shoulder plates, raised area of the shield boss

Step 8: Final basing.

Calthan Brown: Overbrush across the base, being careful to avoid the boots/ legs of the model
Snakebite Leather: Drybrush across the base. Paint the base edges. I usually find 2 coats gives a nice smooth finish.
Codex Grey: Drybrush lightly across the base, paint any crushed coral.
Fortress Grey: Drybrush any crushed coral rocks to add a natural highlight.
Paint on PVA glue, and then sprinkle static grass onto the base.


Tip: Think carefully about how "grassy" you want the unit to look. I find that covering everything with grass is overkill, so I leave about 1/3 of the unit with very minimal or no static grass. This is personal preference though! Things to bear in mind include what kind of movement tray you may be using for this unit and how it is painted, as well as what kind of surface you usually play on? (A grassy battlemat? barren wasteland? etc.)


Finished!


Thanks very much for looking. Please feel free to leave comments and feedback!


Cheers,
Squeek.

Friday, April 6, 2012

High Elf Spearmen - Finished

*Squeek*

No commentary tonight as I have to get up soon for work...

...but I think I have these guys to a point where they are good to go! 


OK, the tray obviously isn't done, and the banner came out too "Druchii", but overall for my first High Elves I am quite satisfied!

*Goodnight!*

Thursday, April 5, 2012

High Elf Spearmen update #3

*Squeek*
No pics today, but having recently made it through a rather hectic period at work have started working on the High Elf Spearmen again.

This evening managed to drybrush raised edges on the shield emblems (it looks like a starburst) with Chainmail and Mithril Silver. This has managed to add a bit of nice highlighting.

I also started painting all the spear hafts in Bleached Bone. I decided that I didn't want to leave the spears in Calthan Brown - very boring (as you can see here.) This seems to be the popular colour in most images (at least, the ones I can see in the Army Book) and it fits in quite well with the idea of High Elves having a cleaner look.

Hopefully will finish these all off by the end of the weekend and will post some more images then!

Cheers,
*Squeek*

p.s. Looks like lots of discussion around the tunnels on the new GW paints. I picked up the new WD when in the UK - quite a new selection that is for sure! With these High Elves if nothing else I will have to pick up the new Ceramite White

Ceramite White. 
Apparently it will cover a black undercoat cleanly in A SINGLE LAYER! 


Saturday, March 24, 2012

High Elf spearmen Update #2

*Squeek*
Been working on this unit over the past week on and off when my kids weren't around. So far I think I have managed to keep this a secret although there have definitely been a couple of close calls!
-basecoats (shields, shields, shields and more shields.)
-washes (boots, armour, faces, shield backs)
-drybrushing (armour, boots, skin)
-eyes. (much harder than Skaven...plenty to learn there.)
-initial highlights (edge of robes)
-Basing (drybrushing, static grass)
Still more detailing and layering to be done, as well as the unit banner, but they look like a unit now. It feels pretty good to rank them up - compared to Skaven as they rank up so easily! (the downside to all those tails...)
The photos aren't good as I took them on my tablet late at night. Bad light, poor camera!
*Squeek*
P.s. I'm using blogger mobile for the first time so it will be interesting to see how the post and photos look...


Tuesday, March 20, 2012

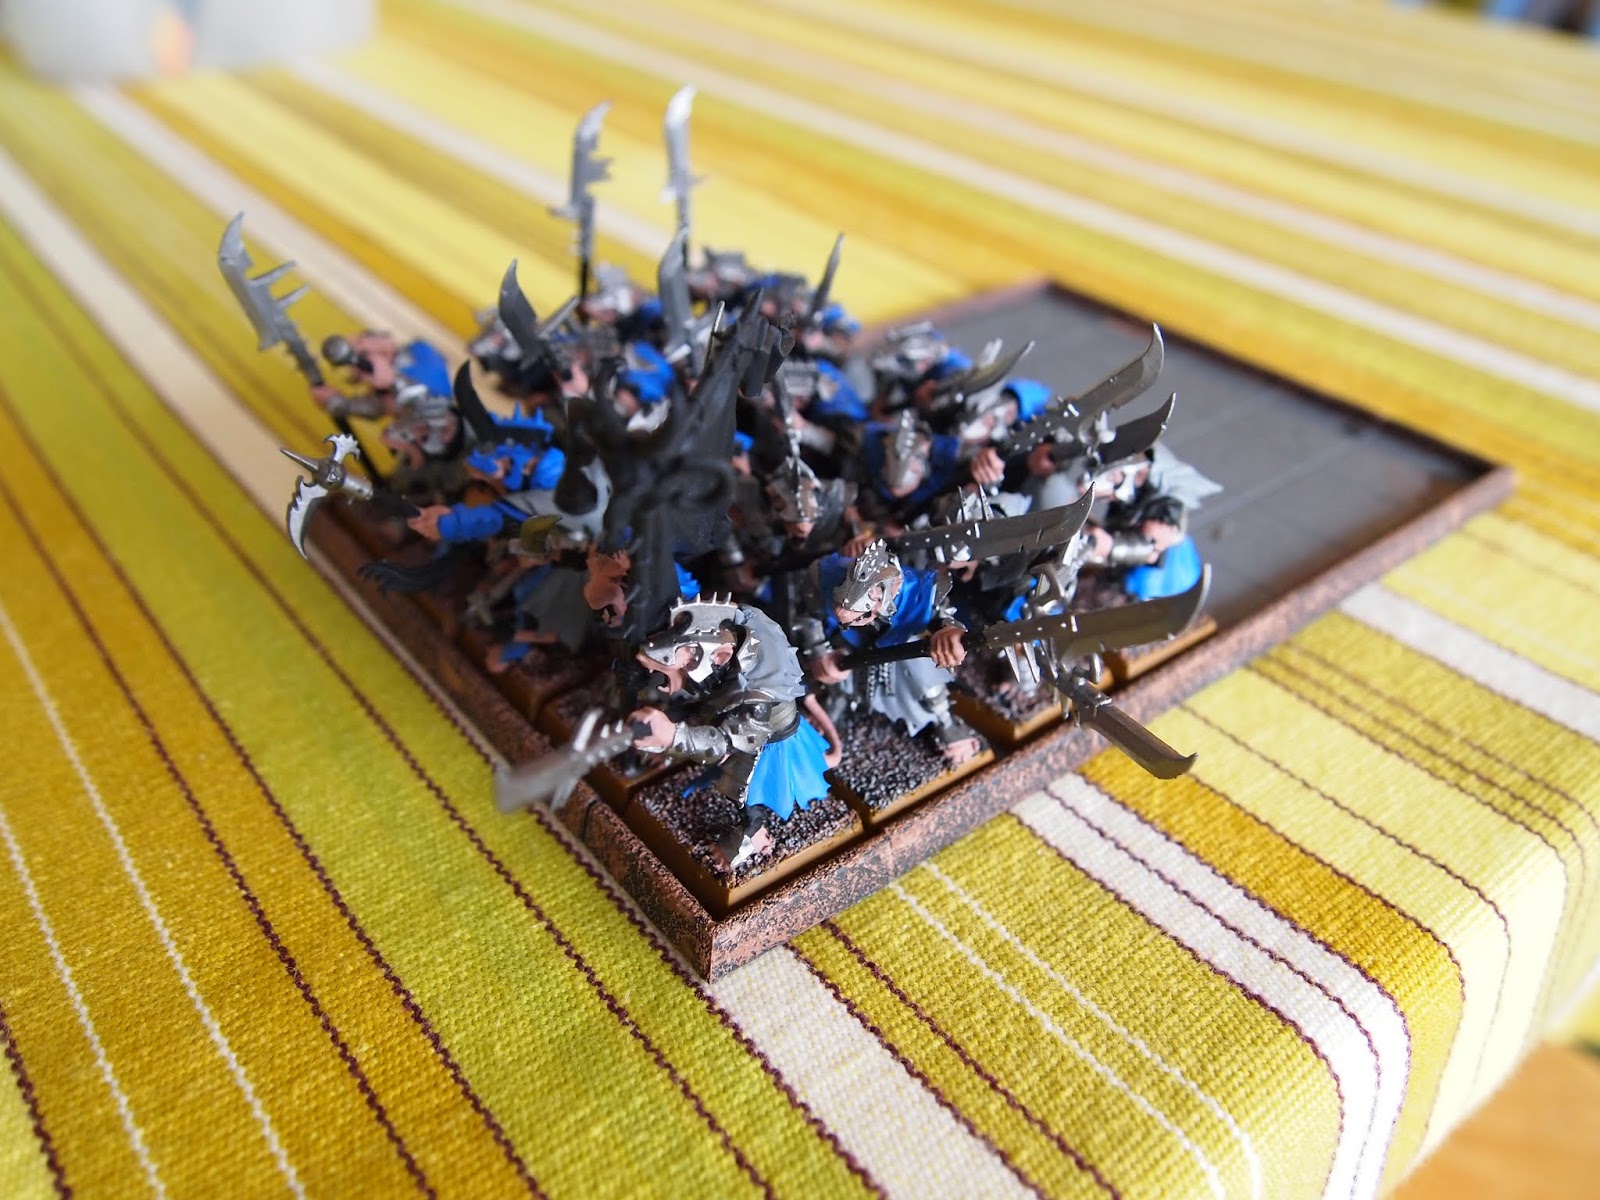
Stormvermin finished! Image showcase.


My Stormvermin Champion Fangleader ("The Pastel Predator")
 *Squeek*

Phew! Finally finished off these guys today (a national holiday in Japan - 春分の日- the spring equinox) and they are ready to join my warlord clan. These are the unit that readers decided I should paint next in a poll I had up earlier in the month - they were the top choice by a mile!

Pics below, followed by some hints and tips and a High Elf update:

I will post a painting guide in a couple of weeks (work is pretty busy at the moment) but some hints and tips that come to mind to remember next time:

1. Filing and filling. 
When assembled, watch out for pieces not meeting cleanly. Difficult to see with a black undercoat, but when painted this leaves you with very obvious gaps. Due to the models, these are particularly obvious in the case of stormvermin because the joins are in really visible places. The armored shoulders and the cloth robes being two good cases in point. Liquid Greenstuff should make this much easier to solve (before painting obviously!) than in the past.

2. Make the champ special
With good reason, the Stormvermin unit champion (or "Fangleader") is one of the most popular sculpts in the whole Skaven range (I think). I am glad I decided to do something different with him to the rest if the unit. I'd recommend this to anyone, as he makes a great Warlord model. Making him different from the rank and file means he looks better if you ever do decide to use him as a warlord. (From what I read, many players don't take stormvermin units, preceding to keep the extra points for more core, so this is quite likely.)

3. "Focus on the candy"
Stormvermin models are pretty detailed, so to speed things up, consider only doing details (layering, edge highlighting etc.) on the command (champion, musician, standard bearer) and whatever other models will be at the front. Because stormvermin are highly detailed, with lots of spikes, nooks and crannies, they look absolutely fine (imho) with only basecoats and a Devlan Mud wash. Models with lots of flatter surfaces are harder to get away with for this I think, as they just tend to look too dark and there isn't enough contrast.

Let me know what you think!

In other news... 
...I spent most evenings this week working on my secret high elf project. I decided to go with white shields and green gems as they seem to work best. I might keep pure warlock purple shields for champions however as I think it looks very striking. That will match the warlock purple edging on the chainmail coat and should look pretty good.
(Models below have had washes, but no highlights or details - e.g. eyes aren't done)


 The problem with painting spear elves is the shields. Getting a decent white, even off a Skull White undercoat, takes at least 3-4 thin coats as far as I can tell so far. Doing 30 shields x4 coats each the other night nearly drove me mad!
TIP: As they are fiddly, and to maximize the speed, I started by mounting all the shields on either end of some pens using blu tack. I could then do one, rotate the pen in my left hand and do the other shield, set them down, pick up another pen and repeat.
Next up, Elven faces.

*Squeek*

Sunday, March 18, 2012

Stormvermin and High Elf Update #1

Copyright unknown. (Found on www.beastsorwar.com)
Contact me if this is your work and you would like it removed!
*Squeek*

I spent some evenings this week on the Stormvermin, and also getting started on some High Elf Spearmen. As the High Elves will be a birthday present for one of my kids (who, before you ask, doesn't really use the internet much so hopefully won't see this!) I am only working on them late at night.

Some update pics below.

Skaven Stormvermin.
Champion. He is the only one with "Blued" armour.
Rank and file.


I managed to get some basic work on the bases done, and also a couple of basecoats. My main Skaven army colour is Ice Blue, so I have used a slighly darker Ice Blue/ Mordian Blue blend to start off with, and will then layer-on from there after some washes. 
Being Stormvermin, there is lots of armour (at least by Skaven standards) so plenty of Boltgun Metal!
I followed through on my idea of only having the unit champion with coloured armour. I figure only he would have enough warptokens to do that (or perhaps the armour is taken from the previous user upon death). The others have some of their cloth done in the army colour.
Next up: Basecoat detailing, washes and highlights.

High Elf Spearmen.


Both of these models have received base-colours but no washes or highlights/ drybrushing.

These guys are taking much, much, longer than I thought they would (which makes me worry slightly about how long cavalry might take!) Apparently High Elves wear white when going into battle, so I worked-up the sleeves from Codex Grey and Fortress Grey through to Skull White - and that takes quite some time.

As purple is my kid's favorite colour, I am experimenting with Liche Purple and Warlock Purple. I hope that some Warlock Purple highlights will lighten the Liche Purple nicely.

My big question is the shields. I like the green gem (came out nicely) but haven't mastered purple yet. The burning question - which shield style is better, Purple or White?  I think white would be more common, and I quite like the purple one, but would it be too Druchii?
How about white for cannon-fodder, and purple for Champions?

All thoughts appreciated.

Cheers,
*Squeek*
Related Posts Plugin for WordPress, Blogger...