Showing posts with label Skaven warlord. Show all posts

Monday, November 17, 2014

How to Paint a Skaven Warlitter


In my last post, I described the materials and process in scratch-building a Skaven War-litter. This time, let's look at how to paint it. As always, I'm not claiming to be a good painter! All my painting is just so I can get an army on the table that looks good from a distance.

On reflection, the Skaven Warlitter is actually made of 3 distinct parts:

  1. The Skaven Warlord
  2. The litter-bearers (crew)
  3. The Howdah
As I have posted "How to Paint" guides for both the Skaven Warlord and Skaven Stormvermin before, this post will just focus mainly on the howdah.

Step-by-Step:


1. Assembly 

2. Undercoat
I use GW Chaos Black spray, but any modelling undercoat spray will be fine! I prefer Black to White as this is a more forgiving colour for beginners. Anything you miss during painting will just appear to be in shadow.

3. Basecoats
Apply basecoats to the model (See list below)


Note: I still have some of "old" GW/ Citadel paints lying around. If you aren't familiar with them, here is a conversion chart I made to match them up with "new" paints.
  • Calthan Brown: Wooden planks, giant rats (fur)
  • Vermin Brown: Wooden plans (do some planks with this colour, or other, lighter browns, to add some variety to the wood)
  • Tallarn Flesh: giant rats (flesh)
  • Knarloc Green: Standard/ Flag. Also any warpstone chunks (embedded in skull eyesockets)
  • Ice Blue: Skaven Shields.
  • Abaddon Black: Arrows (added later)
  • Leadbelcher: Metallics - halberd blades, spikes, chains etc.
  • Dwarf Bronze: Skaven icon, shield parts.
  • Auric Gold: On edges of the Skaven gold icon on the front of the howdah
  • Bleached Bone: Skulls, cords (attaching flag to flag-pole)
  • Sunburst Yellow: Goblin shield heraldry.
4. Washes
The litter after washes
  • Agrax Earthshade: All wooden parts, flag/ standard, bones,
  • Nuln Oil: metallics (spikes, shield parts, chains, blades etc.)
  • Ogryn Flesh: Giant rat flesh.
NOTE: After highlights and drybrushing (Step 5, below) I made and applied a rust wash using watered-down brown and orange.

5. Highlights/ Drybrushing

After highlights/ drybrushing/ edge highlights. e.g.
Goblin shield (top edge) chains, blades, skulls etc.
  • Calthan Brown/ Skull White (80/20 mix): Drybrush raised areas of wooden planks and edges of wooden planks.
  • Bleached Bone/ Skull White (80/ 20 mix): highlights on skulls, bones etc.
  • Leadbelcher/ Chainmail (50/50 mix): Highlights/ edge highlights on blades etc.
  • Calthan Green/ Scorpion Green (40/60 mix): Edges of warpstone chunks in the skulls.
  • Tallarn Flesh/ Elf Flesh (50/50 mix): Giant rat skin.
  • Calthan Green/ Skull White (50/50 mix): Flag. You can do successively lighter mixes on the raised area of the flag.
From a painting perspective, you are done with the Howdah at this point!

Litter-bearers/ Crew:

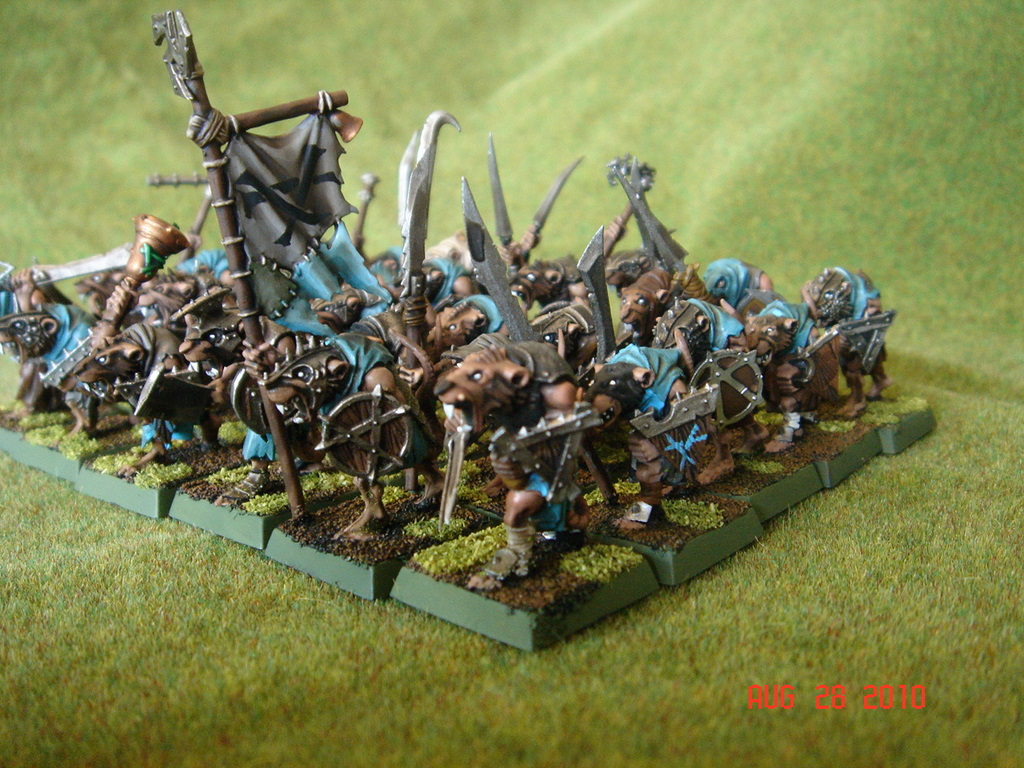
As mentioned above, paint these as you would any Stormvermin (guide to mine here).
After painting, they should rank up and look something like this (ready to balance the howdah on top.)
Not ranked up, they can be used as normal, and look like
they are just carrying spears and clubs.

Ranked-up, and ready to lift the war-litter.
The final touch to the litter-bearers (if, like me, you don't want to glue them together or glue them on to a base) is to magnetize them. This will make it easier to use and move them when they are carrying the war-litter. I use magnetic sheet for this, as you an see in this tutorial.

Stormvermin, showing magnetic sheet attached to tray and bases.
Hope this is useful!

In my next post, I will look at how I made the 28mm arrows that you can see on the finished war-litter.

(EDIT: here is a link to "How to Paint a Skaven Warlitter")

Cheers,

Thursday, January 13, 2011

Skaven Army Update: January 2011

*Squeek*

Here we are, January 2011, with lots of Skaven left to paint! I thought I would take a few moments to look at how far I have come along with this army since April 24th 2010, the date my first box of Skaven arrived, including a Skaven Battalion.

So where are we now?

The boxes arrive. April 24th 2010. Little did I know...


...that I would have so much painting to do!
The original order - assembled.

Grey Seer.

Warlord (with back-banner.)


Chieftain (Battle Standard Bearer)

Chieftain (detail)


"Tetanus" Tweak Vilekin - Warlock Engineer.

 Creak "Boom Boom" Vilekin - Warlock Engineer
(and Tweak's twin...)


Clanrat Unit 1 (x40)

Clanrat Unit 2 (x40)


Skaven Slave Unit 1 (x30) -another 30 underway...
...and yeah, the bases aren't finished!


Warpfire Thrower and Poisoned Wind Mortar crews.

Warpfire Thrower Team 2.


Giant Rats x12 with Pack Master.
x2 Ratswarms (2 bases each.)

Rat Ogres x2 (With Packmasters)


Plague Priest

Plague Monks (x30)


Warplock Jezzails (x1 team)

Warp Lightning Cannon x1

Doomwheel x1


Put that all together and there is probably around 2,000 points of Skaven (if adding in equipment choices, magic items etc.)

Still to do...
x1 Plague Furnace/ Doom Bell and Grey Seer
x1 Clanrat unit (x40, Island of Blood)
x1 Skaven Slaves unit (x30)
x1 Stormvermin Unit (x20)
More Rat Ogres (x4, Island of Blood)
x1 Plague Monk Unit (x20)
Plague Censer Bearers (x10 converted plastic Plague Monk models)

...and I still have to put up a step-by-step guide for the Warlord.
(Sigh) as the man things say:
NO REST FOR THE WICKED!

AHAAHAHAHAHAHA!

*Squeek*

Wednesday, January 5, 2011

Skaven Warlord Image Gallery

*Squeek*

Just a quick update today on perhaps the most important addition(s) to my growing Skaven army:
  • x2 Island of Blood Warlords.
  • x1 Chieftain Battle Standard Bearer conversion. 
I managed to complete these three models over the last couple of days in anticipation of my first game of WFB this coming Saturday. Why are they so important? Well, knowledgeable players (not me) seem to generally agree that the Warlord is absolutely key because of his leadership. Now, LD 7 may not sound that impressive, but when the rest of your army has some of the worst leadership scores in the game this becomes important!

Here are some pictures of the Warlord and a bit more information for each model. I'll try to add a step-by-step painting guide in the next week or so...

Skaven Warlord 1
This is the "Tooled-up" Warlord. By this I mean he has his back banner. I had two warlords from buying two Island of Blood sets so I decided to see what the Warlord would look like with and without the enormous back-banner the model has. (You can see the same Warlord model without the back-banner further down the page.)

I was happy to have this chance because as a rule I am not a huge fan of enormous back-banners like this so I wanted to compare the two models side-by-side. I can only imagine that this thing would really just get in the way! (Yes, I know WFB isn't "Real life" so it doesn't matter and I'm aware of the "Sashimono" back-banners that Japanese warriors would wear, but still they Skaven banners just feel too unwieldy.)
I added some Skaven glyphs to the banner to give it a bit more "Skaven-ness"

On most of my rank-and-file troops I tend to use Devlan Mud for the whole model just because it is so simple and a real time-saver.For this guy I have used some other washes for (I think) a better effect overall. (Thraka Green on the Warpstone flames, Ogryn Flesh on the skin, Gryphonne Sepia on the ropes.)

Here is a close-up. It is a bit difficult to make out, but I used an Ice Blue wash on some of the spikes and other brass parts too to help make the brass metals look a bit dirty and add a patina of age.


Skaven Warlord 2
I used exactly the same colour scheme but simply removed the back-banner after assembly.


All comments and feedback welcome!

Cheers,

*Squeek*

Thursday, October 7, 2010

Skaven Army update.

*Squeek*


Due to the responsibilities that come with being immersed in  Real Life 2.0 I haven't done any painting this week. With that in mind, I thought I would take a moment to simply put down how far I have progressed with painting my Skaven army - and to ask for your help!


Below is a visual thumbnail guide to my units painted so far. Can you tell me roughly how many points this it, and what I should paint next? If I had to fight a battle in one week from now and I needed to have a legal army on the table, what size of battle (points) would I be able to play? What do I need to do/ paint to get a game?


At the bottom is a list of units I have that I haven't painted yet...


Units painted so far:
x40 Clanrats with Full command  


x40 Clanrats with Full command 

30 Skaven Slaves

30 Plague Monks with full command  

x1 Plague Priest

x2 Rat Ogres 

x12 Giant Rats 
x2 Rat Swarms 

x1 Doomwheel
x1 Warplightning cannon
x1 Jezzail 
x1 Chieftain


Units unpainted:


x20 Stormvermin
x1 Greyseer
x2 Island of Blood Warlords
x40 Island of Blood Clanrats
x30 Plague Monks
x30 Skaven Slaves
x1Plague Furnace
x4 Handlers

On the one hand I feel like I have painted a fair amount so far, on the other thinking about all those unpainted models gives me a headache!

Now, I know that I can't field Rat Ogres or Giant Rats without handlers, so I have to paint them. But what would YOU paint next and why?

Thanks!

*Squeek*


Wednesday, June 23, 2010

Skaven Warlord - step-by-step

That's me - Squeek Vermintide - aspiring Skaven Warlord!

First, a couple of pics, and then on to the painting guide:


Note: As this guy is one of the army characters, I have put much more effort into him than I would on a lowly Clan Rat or Skaven slave. Although this looks like a very involved and lengthy list, it doesn't take too long. So here we go!

A.) Undercoat and Basing:
  1. After assembly, liberally apply PVA glue to base and dip in modelling sand.
  2. Wait until dry, then undercoat the whole figure and base. (Chaos Black spraypaint.)
B.) Base coats:

EDIT: Following the launch of the latest Citadel Paint range in 2012, please note that the colours listed below are from the previous range. I hope to have time to rewrite in the future, but for the time being, you can use the conversion chart/ list I made here or use the official Citadel Conversion chart here.
  1. Fur: Drybrush Calthan Brown.
  2. Skin/ Tail/ Feet/ Hands: Tallarn Flesh.
  3. Teeth: Skull white.
  4. Cloth: (Cloak)
    • Regal Blue
    • then 1:1 mix of Regal Blue: Ice Blue, leaving just Regal blue in the shadows.
    • then, along raised folds of cloth, 1:2 mix of Regal Blue:Ice Blue
    • Finally, along edges only of raised folds of cloth, Ice Blue only.
    • OPTIONAL: very thin edges of 1:1 mix of Regal Blue: Skull White
  5. Cloth: (Robes)
    • 1:1 mix of Knarloc Green/ Codex Grey.
    • then 1:2 mix of Knarloc Green/ Codex Grey, leaving just layer in the shadows of the folds
    • then, along raised folds of cloth, Codex Grey
    • OPTIONAL: very thin edges of Fortress Grey
  6. Metal: Boltgun metal. (Weapons, armour) Dwarf Bronze. (cloak clasp)
    • Dark Angels Green on the "ball" in the middle of the war-pick. Then Snot Green, finally build up around the edges of the Skaven symbol with 2:1 Snot Green/ Skull White.
    • OPTIONAL: Leave the elbow cop Chaos Black and drybrush edges later with gun-metal. This provides a nice contrast with the rest of the armour.
  7. Leathers: Snakebite leather. (Ropes, pouches, edges of the eye patch.) 
  8. Standard: Bestial brown (wood), Dwarf Bronze (Cross piece through dwarf head), Gunmetal (Bolts)
  9. Dwarf Head: Tallarn Flesh, then highlight with Dwarf Flesh. 
  10. Severed Neck: Red Gore, then highlight with Blood Red.

C.) Apply WashesLiberally apply Devlan Mud Wash all over. 
This is very important if your primary army colour is something bright. In my case, it is Ice Blue! Using lots of Devlan Mud on the cloak creates great shadows and adds a really dirty feel, offsetting the naturally bright Ice Blue enough that it isn't too bright.

D.) Reapply base colours: Layered up lighter shades/ colours: 

  1. Skin/ Tail/ Feet: Dwarf Flesh on raised areas. (Being careful to leave some Tallarn flesh areas and the shadows created by the Devlan Mud wash and the black undercoat - especially on the tail.)
    • OPTIONAL: Very thin line of Elf Flesh around lips.
  2. Leathers: Snakebite leather/ Skull white (50/50 mix). 
  3. Weapon: Chainmail on blade edges.
  4. Armour: Very thin edge of Chainmail onto armour edges.
  5. Boils, Pus-filled buboes etc. 
    • For "Angry sores": Apply a spot of watered-down blood red onto the top of the spot and let it run down naturally.
    • For "boils" on tail: Paint the boil Dwarf Flesh. When dry, just touch with a spot of Elf Flesh.

E.) Final Drybrushing:
  1. Fur: Drybrush Calthan Brown/ Skull White (50/50).
  2. Base: Drybrush Calthan brown, then drybrush Tallarn Flesh.
  3. Dwarf Head: Drybrush beard with Codex Grey, and again with Fortress grey.
  4. Armour: Chainmail on elbow cop, across gauntlets.
  5. Ropes: Snakebite Leather/ Skull White (2:1)
  6. Metal Clasp: Shining Gold.
E.) Final Basing:
  1. Apply dabs of PVA glue onto the base and dip into green flock.
  2. For long, dry-grass, put a blob of PVA and insert modelling grass cut to length. Hold or support while the glue dries and arrange the grass as you wish.
  3. Paint base sides Knarloc Green.
DONE! (Phew!)

I think I have roughly remembered the steps right...hope you find this useful!

*Squeek*
Related Posts Plugin for WordPress, Blogger...